1. Loading of LPT Environment
For j-platform/Jugnu version below 2.58, click here
Download the relevant compatible files and open them in a directory of your choice.
To download j-platform/jugnu EAR click here
Örn : C:\lpt\run LPT.bat Run your LPT development environment.
There is a sample project in the package.
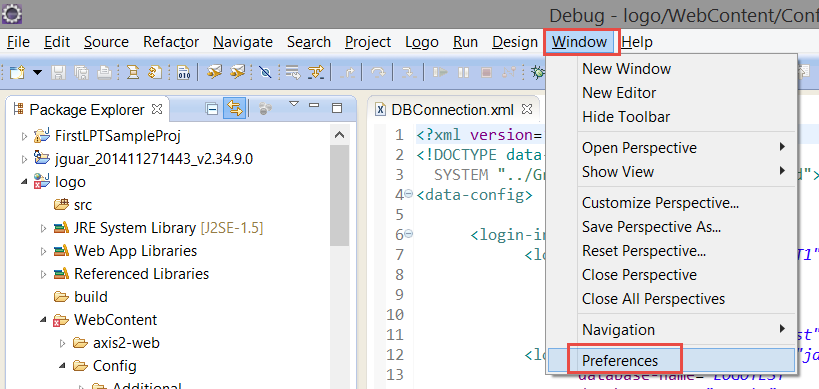
- Open the "Window / Preferences" window,
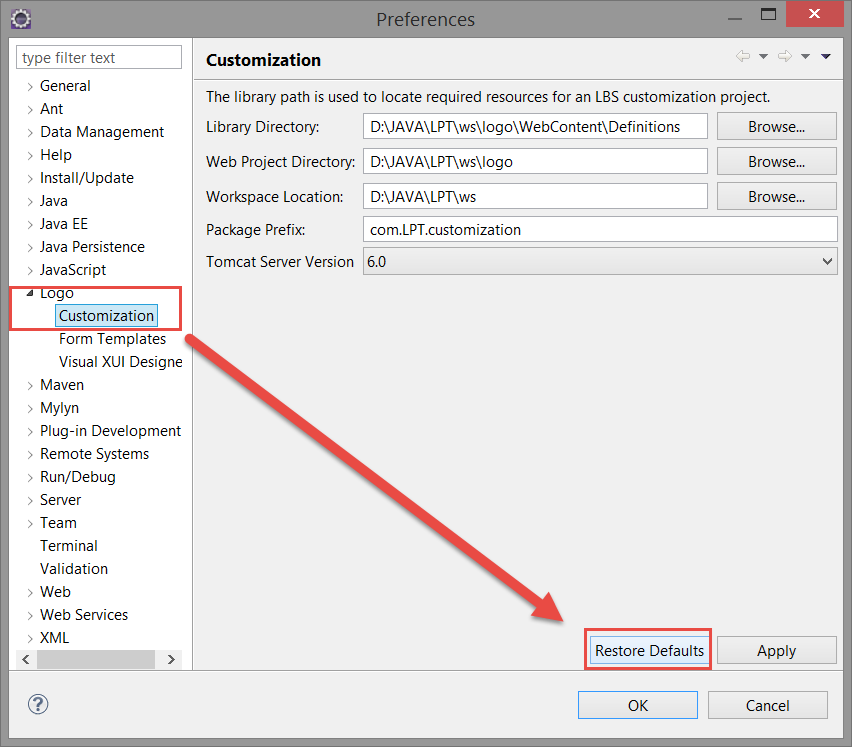
- Logo / Customization” Then click "Restore Defaults" button.
All path settings will be made automatically.
- For Source Code Settings;
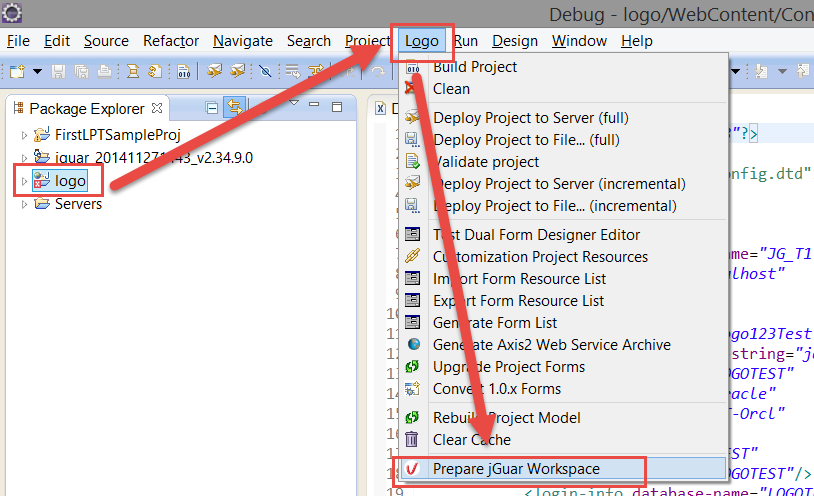
If you want to be able to DEBUG on the source code, it is sufficient to select "Logo / Prepare jguar WorkSpace" process on the "logo" project
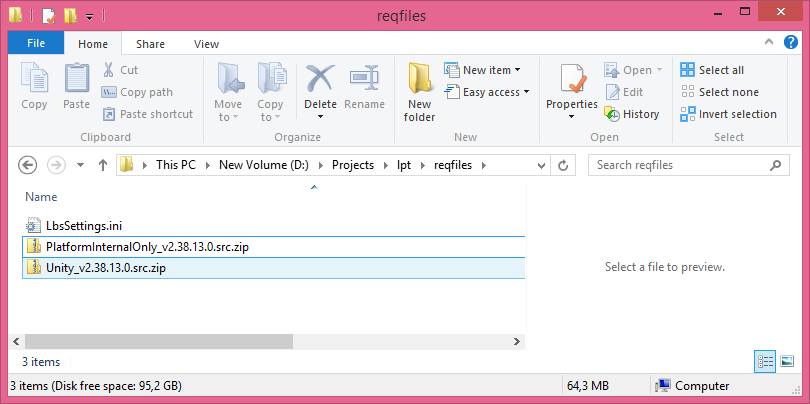
and select the "ReqFiles" folder from the following screen and perform a "refresh" operation on the "logo" project after the process is completed.
- The source code is stored locally in the reqfiles directory.
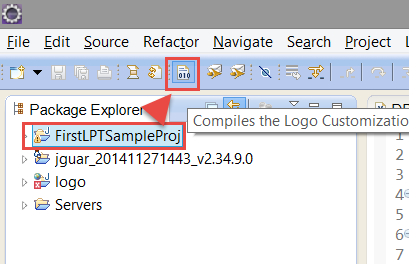
- Server, JDK, library v.s. For our settings, all we need to do is select our customization project and run the following "Compile" process.
2. Database Settings
With the help of Ctrl + Shift + R, "Open Resource" screen opens and DBConnection.xml is searched. After the relevant file is selected from the found results, "Open" button is clicked.
Note: If the DBConnection.xml file is not found, the DBConnection_SAMPLE.xml document is renamed and the path is resumed.
The database information to be used is edited in the DBConnection.xml file.
<login-info name="ERP_TEST" database-type="Oracle" service-name="ORCL"
server-name="172.16.52.182" database-name="ERPTEST" user-name="ERPTEST"
user-password="ERPTEST" /><login-info name="LOCAL-MSSQL" database-type="MS-SQL"
server-name="localhost" database-name="UNITYOD1" user-name="sa"
user-password="qawsed" />
Then the name of the defined "login-info" is written to "active-login-info".
<active-login-info name="LOCAL-MSSQL" />This will connect you to your j-platform database.
Note: The server stop must be started when the DBConnection.xml content is changed.
3. License Installation Process
The Solution Partner package is a protected package. We have passed the Solution Partner set through the above steps and completed the Server Administration operations, but the j-platform Administration and j-platform Client applications will not open because no license activation has occurred.
j-platform Administration and j-platform The activation process must be completed with the j-platform Solution Partner License Keys transmitted by the Logo in order to use the Client applications.
Important Note: Since the new version must be reinstalled for the product, activation must be done with the existing license key after each installation.
Product Activation Operations
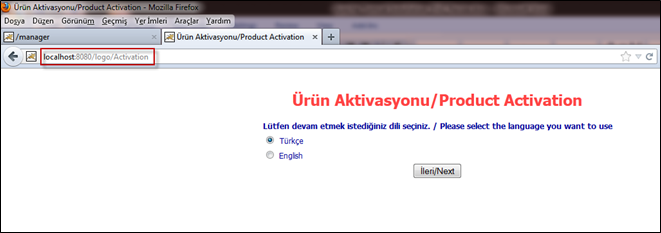
Activation process http://localhost:8080/logo/Activation It should be done via the link. In order for the activation process to be completed in a healthy way, it is necessary to have a working internet connection.
The first requirement for activation process Your Tomcat server It is not working in "Debug mode". If your server is running this way and you try to run the activation process, you will get the error message below.
In this case, you will have to go back to the activation page once you have stopped and restarted your server by saying "Start".
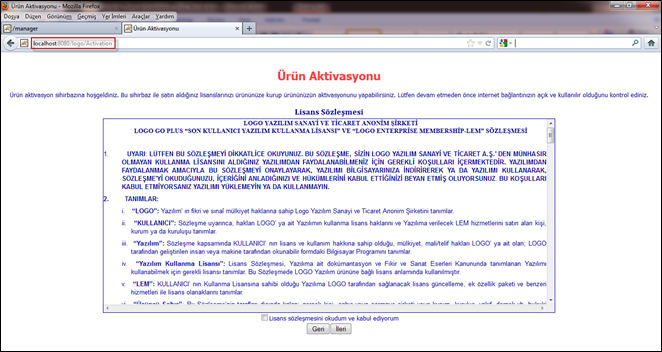
The activation process is started by language selection and activation process is continued according to the directions on the screen.
The license key transmitted by the logo is entered and processing continues.
There is a need for Reseller user, Reseller password and User password during activation. This information has to be prepared in order for the activation process to continue. If the key is checked after the above screen is displayed and it is correct, User Code and Dealer password are requested, the user password is required. If all the information is correct, the activation will continue with a screen where customer information can be entered and updated. In the next few steps we do not need a data entry, we can continue to say advanced and complete the activation.
Important Note: In the jadmin after activation, the license key added to the group definitions in the Administrator group has been selected. When a new group is added in the same way, this license key must also be selected as the newly defined group.
If License Refresh Warning is received, license renewal should be done with http://localhost:8080/logo/LicenseRenewal command.
4. Creating System Tables
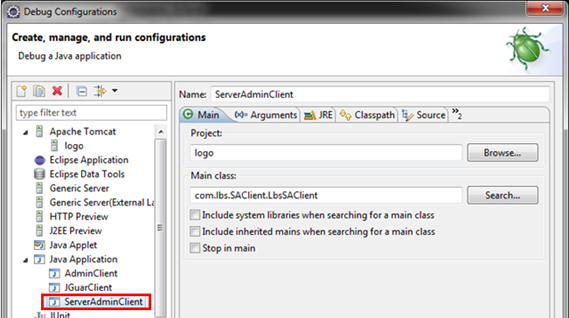
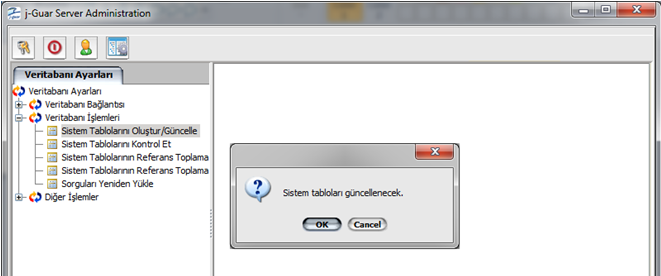
From the LPT environment, open the "Debug Configurations" screen, click on "ServerAdminClient" and press "Debug" button.
Username: LOGO
Password: LOGO
When the "System tables updated" warning was displayed, the necessary system tables for the j-platform product were successfully created.
Creation of institution statements
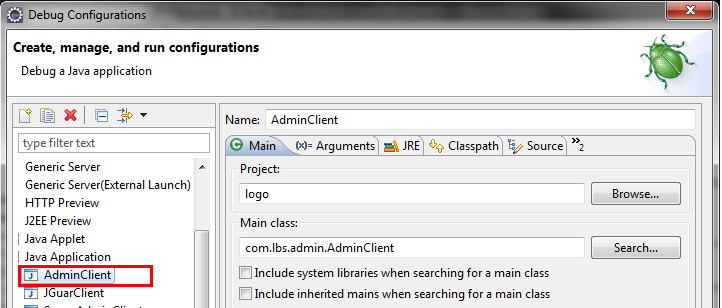
Debug Configurations "screen and click" AdminClient "and press" Debug "button.
The following information is entered from the screen that opens.
Username: admin
Password: logo
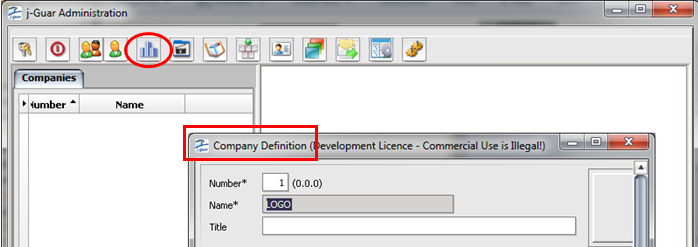
After entry, click on the "Institutions" button shown below. We add the institution by filling in the institution information with the additional option.
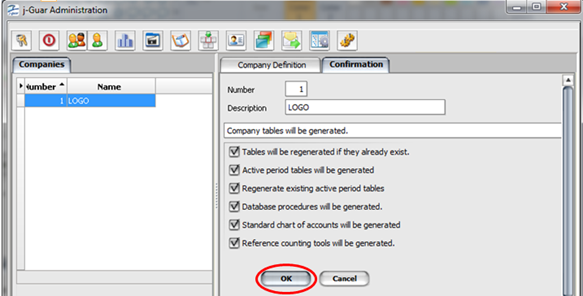
After the institution is created, "OK" button is clicked on the "j-platform Administration" screen and the establishment of institution tables starts.
Processes and results on the institution tables will be reported below on the screen. We can continue the installation with the message that the operation is finished.
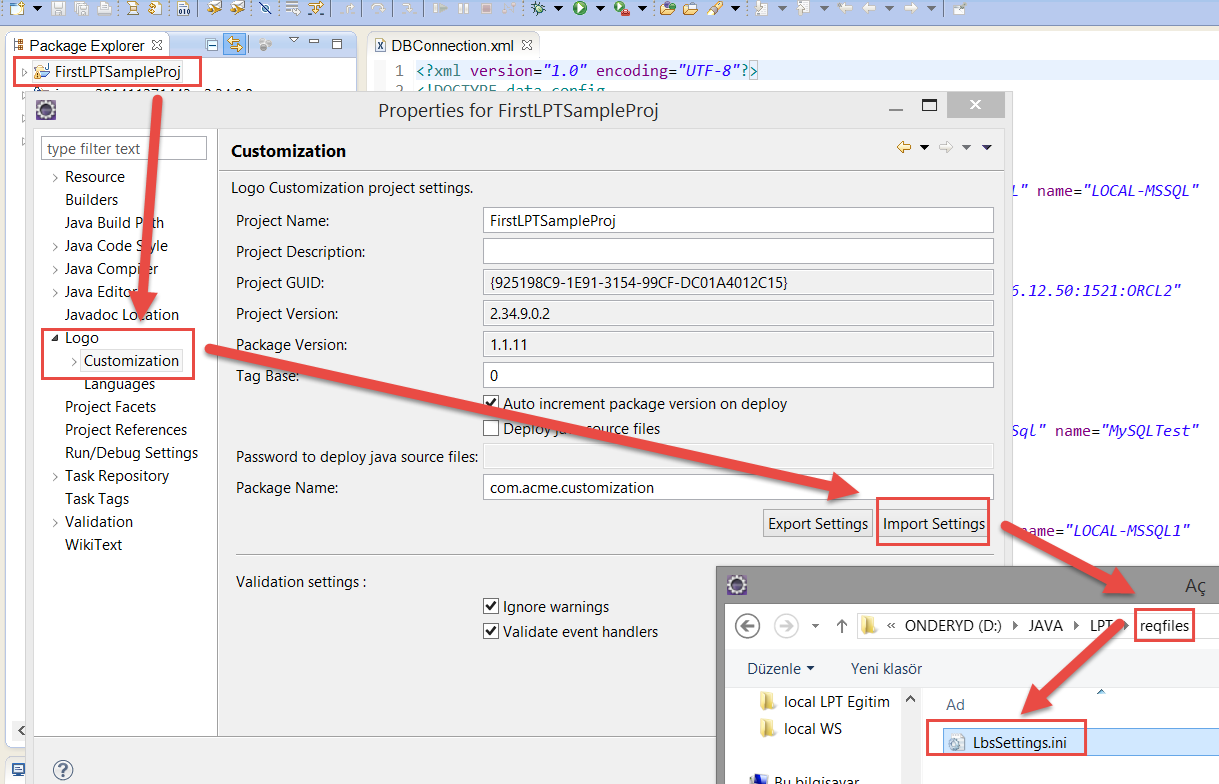
The GUID value will change because there will likely be a folder change in our project.
To fix the "import settings" option shown below with the "reqfiles"
Folder under the "LbsSettings" file you can read.
If you use your own progeny it is not the file we gave
Be sure to update with the GUID value of your customization process.
Note:
- For product activation ...
- To update the new set appropriately. Please LPT Update Operation Follow the steps.

