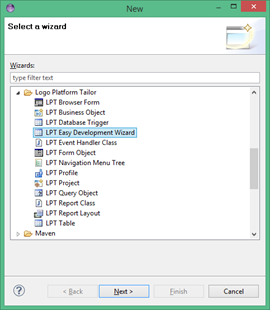
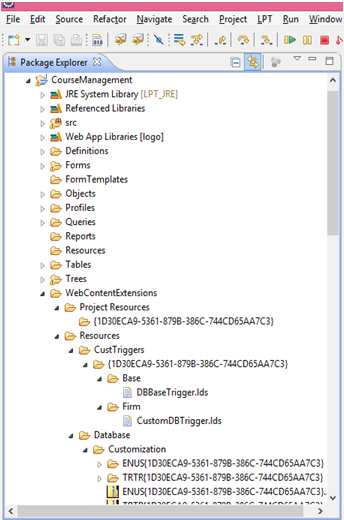
With Eclipse Ctrl + N Right click on "Project Explorer" in Eclipse and select New> Other.
Here you can see the tools we can use while developing the LPT project.
The tools there are usually made up of several screens.
Not: All wizards will be told in order.
LPT Browser Form
The Browser (List, Browser) form is the base object of the product.
The browser form allows you to direct the list that is the end of the query object.
Reminder: "Query Object" and "Browser Form" link is done here. It is important that a "Query Object" is created before creating a "Browser Form".
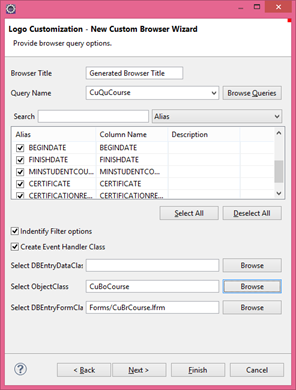
Browser form query options
Browser Title : Title of the relevant form
Query Name : Allows you to select the current query object
Identity Filter Options : You can specify which filter options you want to set. Depending on the selection, the corresponding window will be displayed later.
Create Event Handler Class : The handler class associated with this form will be created.
DB Entry Data Class : The work object to be used to add and modify records associated with the Browser.
Object Class : The business object associated with each record
DB Entry Form Class : The form object to be used for adding and modifying records associated with the Browser.
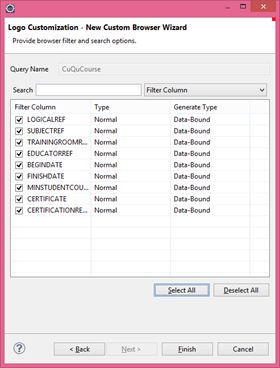
Browser Filter Screen
Mark the columns that will be filtered and visible in the filter column of the Browser form, and then mark the filtering type.
As filtration type options:
- Normal
- Range
- List Selection
- Group Selection
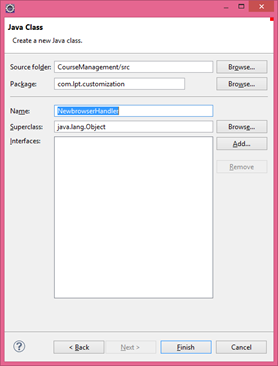
Browser Handler Class Creation
On this screen, the event handler class of the browser is created.
Click the "Finish" button after completing the necessary fields.
LPT Business Object
Before you create data entry forms, you must create a Custom Business Object to perform CRUD operations.
Business Objects are data types that provide communication between the database management system and forms. The Custom Business Object for data entry, update, or deletion performs relevant changes in the database and displays the actual data contained in the form.
Note: Business objects are created based on the table.
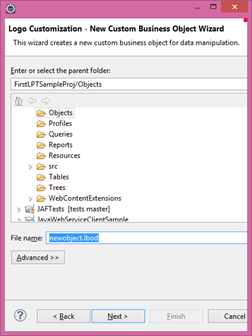
To open this wizard, the LPT Business Object is selected from the LPT Wizard.
Business Object File Name
The job object is given a file name. It is recommended that it conforms to the naming convention.
Template Business Object Selection
The adaptation business object can extend the business object in the business. The first window is the template selection screen when creating the Custom business object.
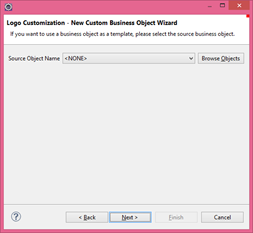
Table Selection
If Template is not selected, the corresponding table is selected. The table fields will be listed, from which the desired fields are selected for the work object.

Business Object Extension Selection
Note: The extension of a private business object cannot be a Custom Business Object.
Business objects defined in the calendar are listed on this tab. If you have an extension of any work object, you can make a selection, or if you want to follow a simple path, check the <NONE> option and click the Finish button.
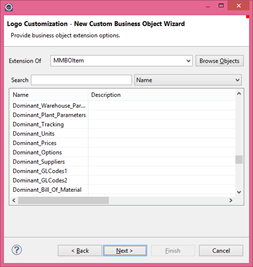
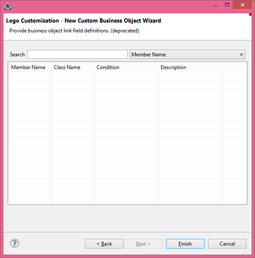
Table Link Definition
The link definition can be made using the link on the table where the business object is connected.
On this screen, you can define a new link with a right-click.
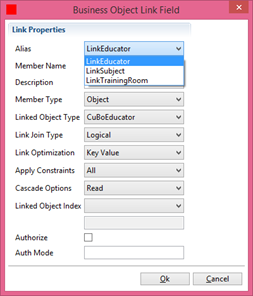
Business Object Table Link Definition
Alias: Name of table link
Member Name: The unique name of the defined link
Description: Information about the link
Member Type: Connection relationship type, "Object" or "Collection" can be selected
Linked Object Type: Type of business object that will connect
Link Join Type: Defines the type of concatenation. Can be "Logical", "Inner" or "Outer"
Apply Constraints: Determine whether constraints should be applied
Cascade Options: The usage constraint of the connection object is determined (read, update, or delete)
Link Object Index: The index to be used during the connection operation.
Authorize ve Auth Mode, specifies whether the connection definition is used in the authorization mechanism and authorization mode of the application.
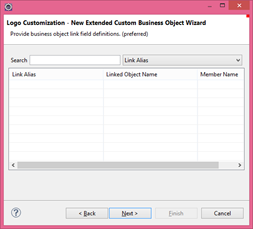
Business Object Link Definition
When links are established directly between business objects, the links between the tables are not used.
This method is not recommended for performance reasons.
Business Object Link Areas
Member Name: Unique Link is the name.
Description : Description is
Member Type : Select the appropriate object, collection options.
Linked Object Type: The work object to be linked is selected.
Cascade Options : read, read & update, read & update & delete.
Linked Object Index: The index of the link object is selected.
Link Condition: Link conditional expression field.

Reminder: Linking should be preferred between tables if possible.
The file with the lbod extension is created under the Object directory.
The definitions of the business object related parameters can easily be changed from the following Business Object Definition window.
Details on the design screens are provided in the following sections.
LPT Database Trigger
Trigger is a special case of a stored procedure. The database runs automatically when there is an event in the table or view in the server. Triggers are often used to protect database integrity.
Database Trigger Creation
Triggers will work on tables depending on INSERT, UPDATE or DELETE operations.
You can create 3 types of triggers.
- Base Trigger: Company or period independent.
- Firm Trigger: company dependent.
- Period Trigger: Period dependent.
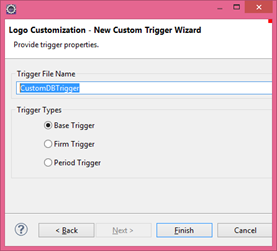
Trigger File
The file named Trigger File Name is created in the corresponding directory. You can write database-independent trigger statements for this file.
Defined triggers will be associated with the GUID.
The trigger statements written in the logo definition language are created in accordance with the selected database during database update related to the adaptation via "j-platform administration".
You can examine the trigger example that will work after the delete operation below.
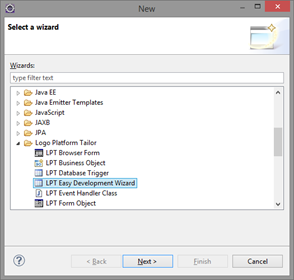
LPT Easy Development Wizard
It does not create a file like the one in the other wizards. It provides easy adaptation with sequential execution of the following wizards.
- Table
- Business Object
- Query Form
- The wizard for the Browser and Form visual objects calls the screens in sequence.
If you are developing an adaptation project that is close to product standards, it will provide considerable convenience during development.
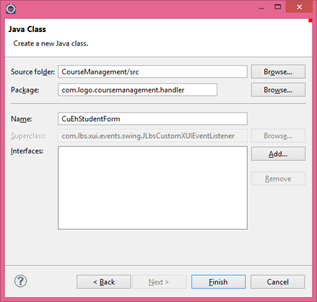
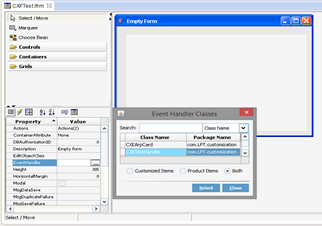
LPT Event Handler Class
Form eventlerinin handler sınıfıdır.
When the form is initialized, the constructions that will be executed at the end of any action when a button is pressed are defined here.
Handler classes can be set up automatically during the creation of the form, or later manually associated with the forms.
LPT Form Object
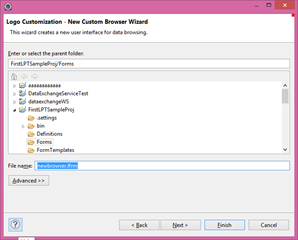
Select LPT Form from wizard selection screen.
A file with the lfrm extension is created under the Forms directory.
Form files are the serialized and written xml file containing the components and properties of the screen design.
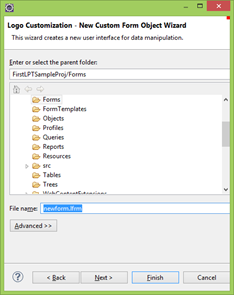
With the "Create Event Handler Class" option, the handler class is created under the src. If you want to create an event handler class for one of the empty or template forms, mark the "Create Event Handler class" option and then click the Finish button.
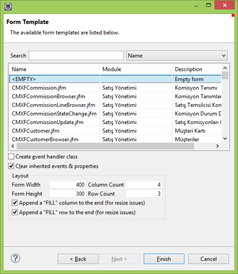
In the list of form templates, select <EMPTY>, then click Next
Note: If you select one from the form templates, the custom form will have an event handler class for the template form. If you do not want to use the event handler class of the template form, check the "Clear Inherited Events and Properties" option in this window.
LPT Navigation Menu Tree
Navigation Menu Tree is one of the basic components in the site. Browsers, Forms, and reports can be added to or removed from the navigation tree as a module.
The ".ltre" extension tree is created under the tree directory. This file can be easily adapted using the editor in the LPT environment. Existing modules/forms / etc. you can add or remove them. You can add the forms you have created for creating and modifying new modules underneath.
Reminder: This tracking tree must be associated with the profile in order to appear on the fly, then this profile must be added to the relevant user/user group.

LPT Profile
To associate the adaptation project with the product, we need to create a Profile. Different profiles can be defined according to user roles.
The LPT profile wizard will create a user profile under the "Profiles" directory. The association of the profile with the navigation menu tree will be done from the profile design screen.

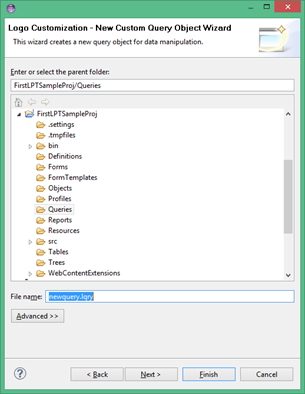
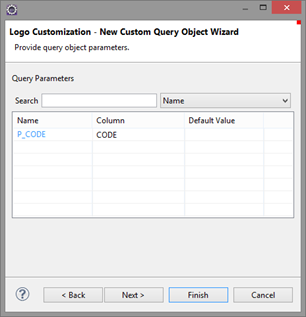
LPT Query Object
Query Object File Name
Query objects are query objects that are used to define dynamic views in specific sets of tables.
Views created with the query object;
- single table
- may contain many tabulations combined with complex conditions.
Parameters and dynamic constraint conditions allow you to use a query definition for many purposes.
If you want to create a query with the default parameter, you can click the "Finish" button directly.
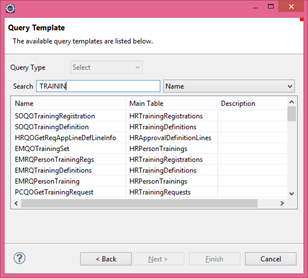
Query Template
This page will prompt you to enter the query type. Insert, Update, Delete, and Select query types are supported in query definition. You can also create a new query from scratch or an advanced query from a template by changing the query type.
Select Query type / Query type. You can select the desired query as the basic template. The contents of the template will be copied to the new query definition.
In this example, select the <EMPTY> line in the template list to create a new query of type "Select".
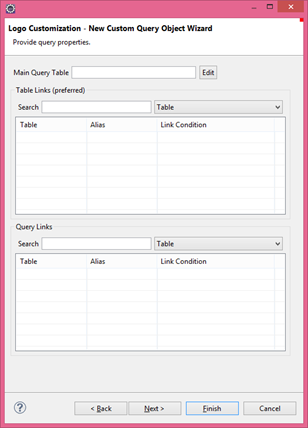
Query Links
The query and table objects are windows for defining links.
Table Links (Preferred):
The link between the tables is more accurate in terms of architecture.
Query Links:
Records can be added based on alias (alias) and link condition (link condition) values.
The information entered on this screen can be updated later in the "Query Object Definition" design window, which will double-click on the query object.
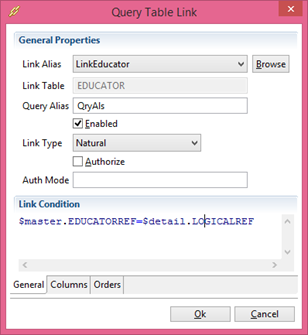
Defining a table link
Link Alias : You can select the links defined in the selected tablature.
Link Table : The name of the table associated with the link.
Query Alias : This is the name you will give to the link.
Link Type : Specifies the joining pattern. You can choose between "Natural", "Left Inner", "Left Outer" and "Right Outer".
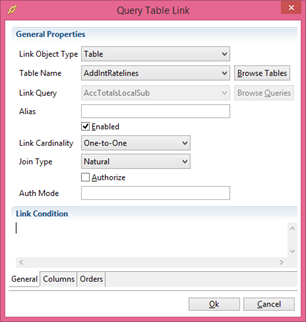
Sorgu Linki Tanımlama
Link Object Type specifies whether the connection definition is a tabular or not.
Link Object tipi seçimine göre
Table Name or Link Query fields will be active.
Link Cardinality: "One-to-One" or "One-to-Many" option is used.
Query Parameter Definitions
Parameter declarations are made for use in condition expression
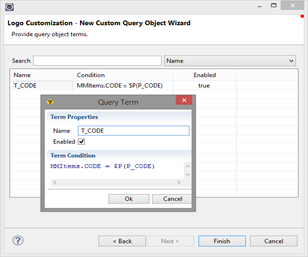
Query Condition Definitions
Used to create the condition statement of the query object.
You can test the query object you created with Logo Custom Query Tester. Eclipse> Package Explorer, this option is selected when the corresponding query object is selected and right clicked.
LPT Report Class
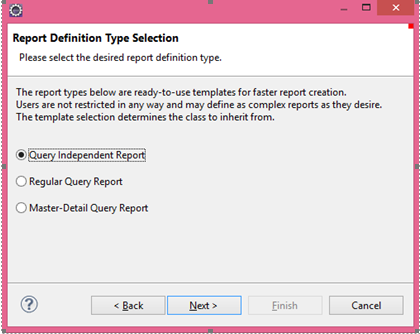
Report Definition Type Selection
It provides you with templates to prepare quick reports. The user is never restricted to report.
Query Independent Report : The query is selected to generate independent reports.
Regular Query Report : Genel raporlar için. Bu raporun tek bir sorgusu vardır.
Master Detail Query Report : For reports with two questions.
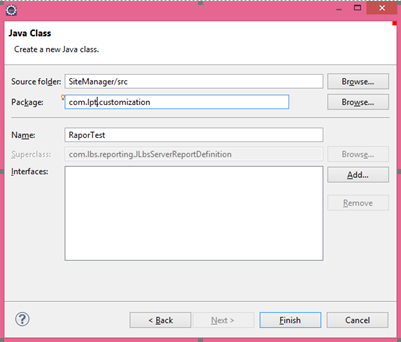
Report Class
The given class name and java file will be created under the relevant package.
Depending on the selected template, you may come across screens where you can select the main and detail quests.
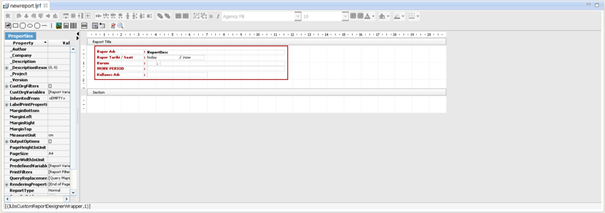
LPT Report Layout
You can use the LPT Report Layout to create a Custom Report.
LPT Report Layout Wizard Selection
Create a new Custom Report Layout.
Click File> New> Other ..., and then click Logo Customization Wizards> LPT Report Layout, and then click Next.
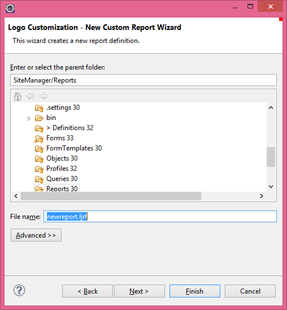
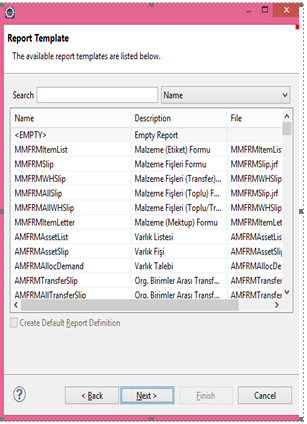
Report Template
Type PatientList.ljrf as the filename and click Next.
Create Default Report Definition: If this option is checked, the next window report definition type cannot be selected.
The existing form templates of the j-platform application are listed.
In the list of report templates, select <EMPTY>, then click Next.
Report Template and Handler
In this page, report definition, a general header section, and Event Handler are created.
Appropriate fields are selected for the report.

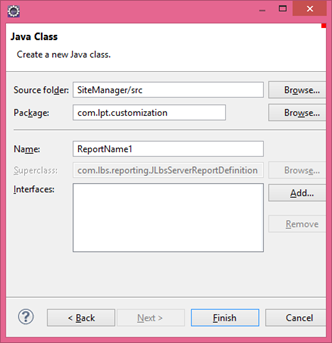
Report Class
In this page, event handler class (event handler class) is created for report definition.
Name: It will be automatically assigned from the previous page. You can change it if you like.
Query Template
Select the question to be executed for the report. Then click the Finish button.
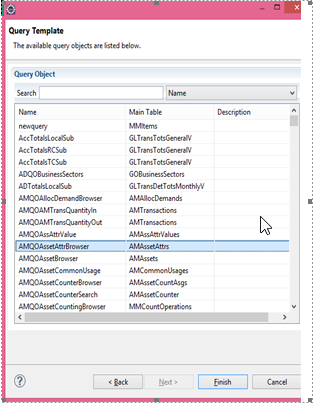
If the user selects Empty Report Template, a report is generated with a single partition as shown below.
LPT Table
Custom Table Wizard
File Name: The only filename specified here. The table name is given in the next window.
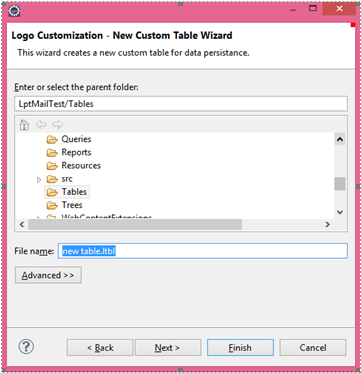
Table Field Definitions
Table Name: The name of the table to be used for the application
Physical Name: The table name to be created in the database
Name Parameters: Contains information about whether the table is a company and/or a period table.
Record Info Column: Select whether or not to add record information to the table.
LOGICALREF: The primary key on all tables is left. Automatically generated.
Table fields can be easily added with a right click on the grid.
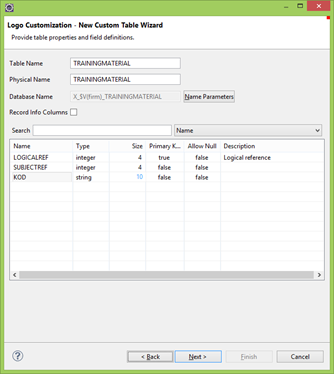
Table Index Definitions
It is the one that will provide you with a quick search.
Suffix: Prefix
Name: Index name
Segments: You can select multiple table fields.
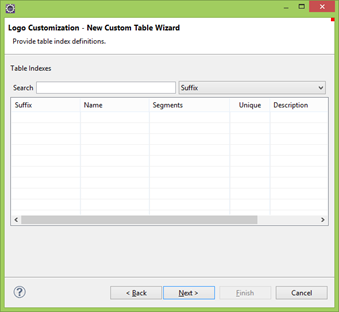
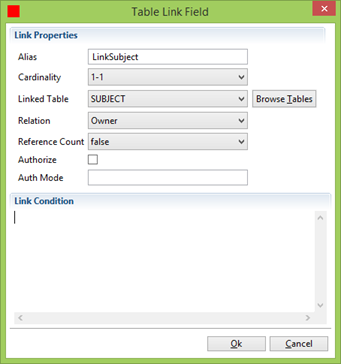
Table Link Fields
Alias: The table link is the name. The connection defined here will then be used in objects and in queries.
Cardinality: Describes how each table is linked to the other.
1-1 (individual)
1-N (multiple)
Linked Table: The other table to be connected is selected.
Relation: Defines the relationship between tables. (Owner, Reference)
Reference Count: Select "true" if you want the reference counting structure defined in the cookie to work for this connection.
Authorize: The checkbox is used to indicate whether the connection is in the authorization mechanism. If this option is checked, Auth Mode defines the mode of this connection.
Auth Mode: Authorization mode definition.
Link Condition: The field where you can define the connection condition. There is a helper that opens with CRTL + Space.