You can create reports with header and detail information by using Custom Queries that we created via LPT in the report definitions.
Process steps;
1- If we click on the right click> New> Other option on our project, select LPT Report Layout field under the Logo Platform Tailor folder on the New Select a Wizards screen and click on the "Next" Button.
2 - From the "New Custom Report Wizard" screen, define the report name in the File name and click "Next" button.
3 - Without making any changes on the incoming screen, we proceed with the "Next" button.
4 - Report On the "Template and Handler" screen, write the report name and description and select the type. As the Master-Detail Query Report is described in this document, select that area and proceed with the "Next" button.
5 -The report-dependent java class name can be changed on demand, or the report design and class are created with the "Next" button without modifying the name generated by the system.
6 - The information you will be listing in detail must be linked to the main query.
7 - If the system needs to relate to the report as well, we do parameter and term definitions.
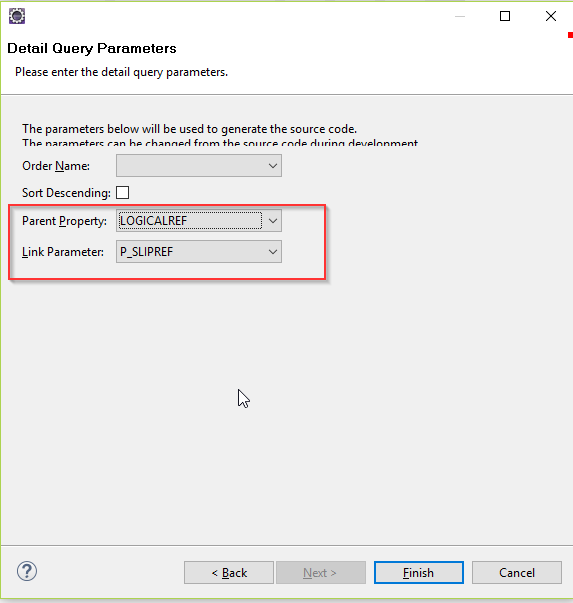
The LogicalRef field of the main query will be sent to the parameter section, showing how it was done in the following steps.
8- Select the CQCourseSlipBrowser that we want to create the Inbound Screen Report and the CQCourseSlipLine query associated with this query and click on the "Next" button.
9- From this screen, the main field will be filled with the Logicalref and click on the finish button.
10 – In the generated report design screen, the title fields of the main query are entered in the section section.
11 - A new section field is added under the heading.
12- Right mouse click on the report> import query fields option is selected.
13- From the screen that opens, select the main query and press the next button.
14 – which fields the main query are needed on the incoming screen, they are selected and clicked on the finish button.
Note: In the Variable Name Prefix field, we enter the definition that we want to append to the field names in the report definition.
15- Again, right click on the report and select the import query fields option and add the fields by selecting the detail query associated with the main query.
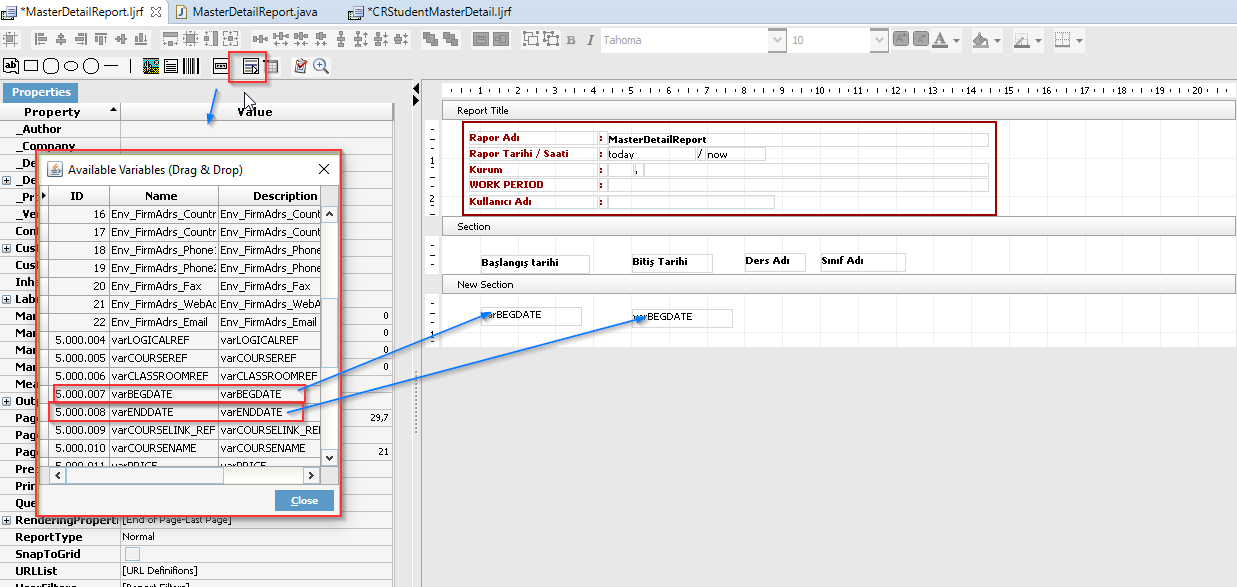
16- The values of the header fields are dragged from the variables list after the selection process.
17- The headings of the detail field are added by adding a new section.
18-Add a new section for the detail section and add the required fields from the variables list.
19- You can see that our association process is automatically configured in the constructor method that is created automatically for the class created for the report. Here you need to change / * detail body * / field. We change the section IDs that we designed in detail to 4.
public MasterDetailReport(JLbsReportLayout
layout, IReportRenderer renderer) {
             super(layout, renderer);
             // TODO Auto-generated constructor stub
             setMainQueryName("CQCourseSlipBrowser");
             setMainBodySection(2);
             registerDetailQuery(null, "CQCourseSlipLines", null, // order name
                           false, // is descending
                           "LOGICALREF", // parent property
                           "P_SLIPREF", // link parameter
                           null /* headers*/, null /* footers*/, 4 /* detail body */);
             setActive("CQCourseSlipLines", true);
       }
20- Within the class, two methods are overridden for the first header field to be shown and the second one for the detail field.
In the first method, the section designation of the section where the header information is located on the report design screen is defined as printSection (1);
      @Override
       protected void printQueryObject(QueryBusinessObject record, int order)
                    throws LbsLocalizableException {

             printSection(1);
             super.printQueryObject(record, order);
       }

       @Override
       protected void printDetailQueryObject(String string, int queryId,
                    QueryBusinessObject parent, QueryBusinessObject record,
                    int bodySec, int j) throws LbsLocalizableException {
             // TODO Auto-generated method stub
             super.printDetailQueryObject(string, queryId, parent, record, bodySec, j);
       }
21- Finally, we want to position the report on the Tree where we want it. We can deploy the project.


