- To take up an example of how to add an extension
as you form, we are taking purchase invoice browser. - To see the Purchase Invoice form
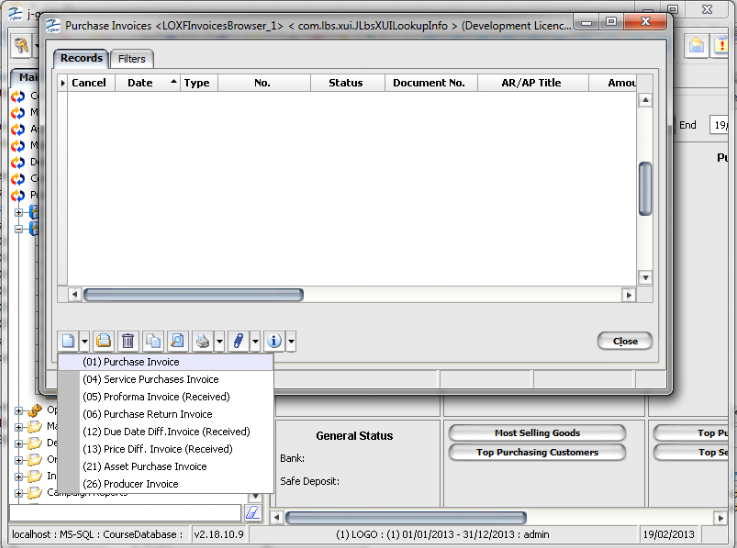
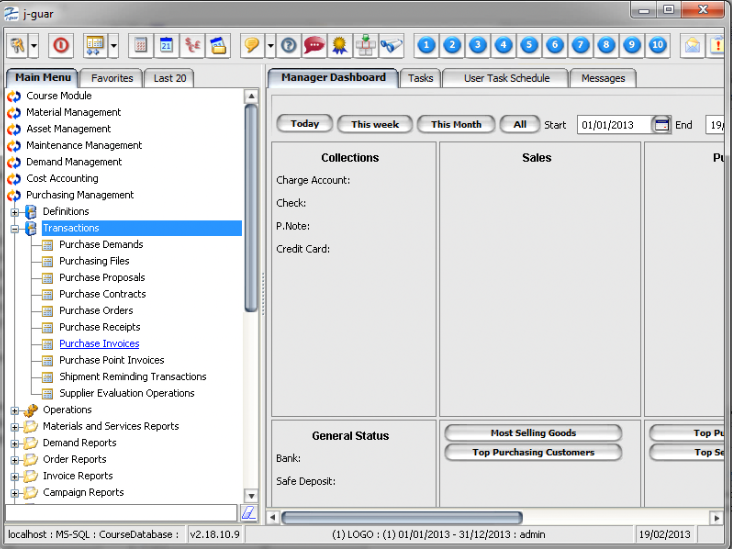
Login into the j-platform–> Purchasing Management -->
Transactions–> Purchase Invoice - Create new purchase invoice form.
|
|
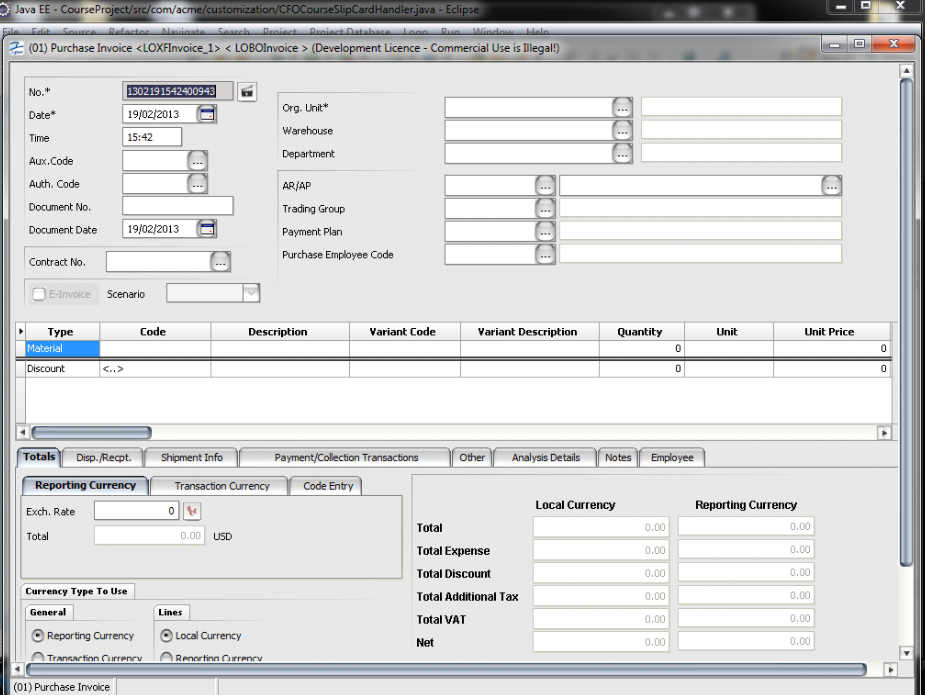
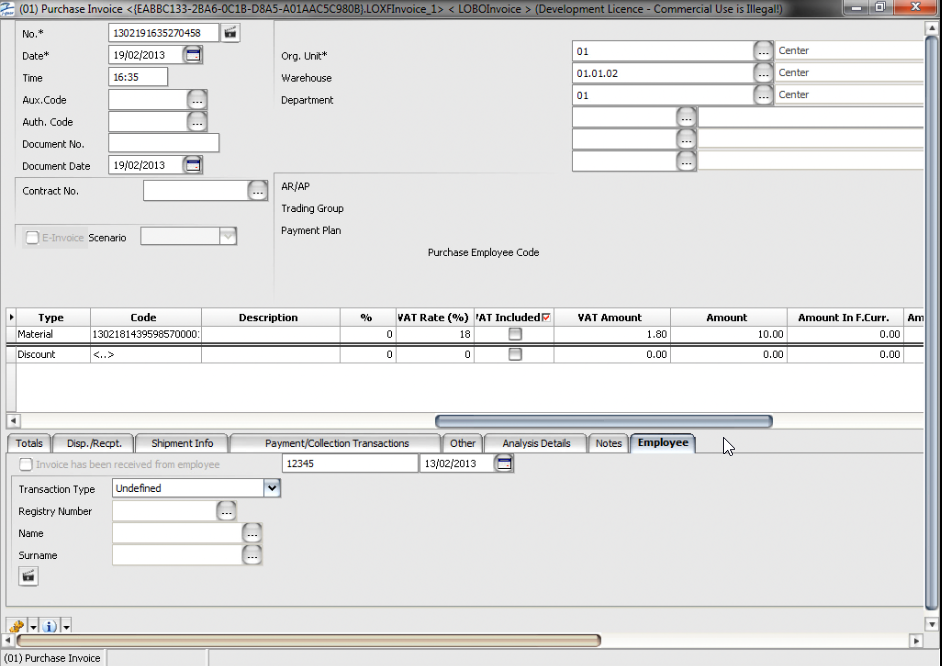
- The Purchase Invoice form will open.
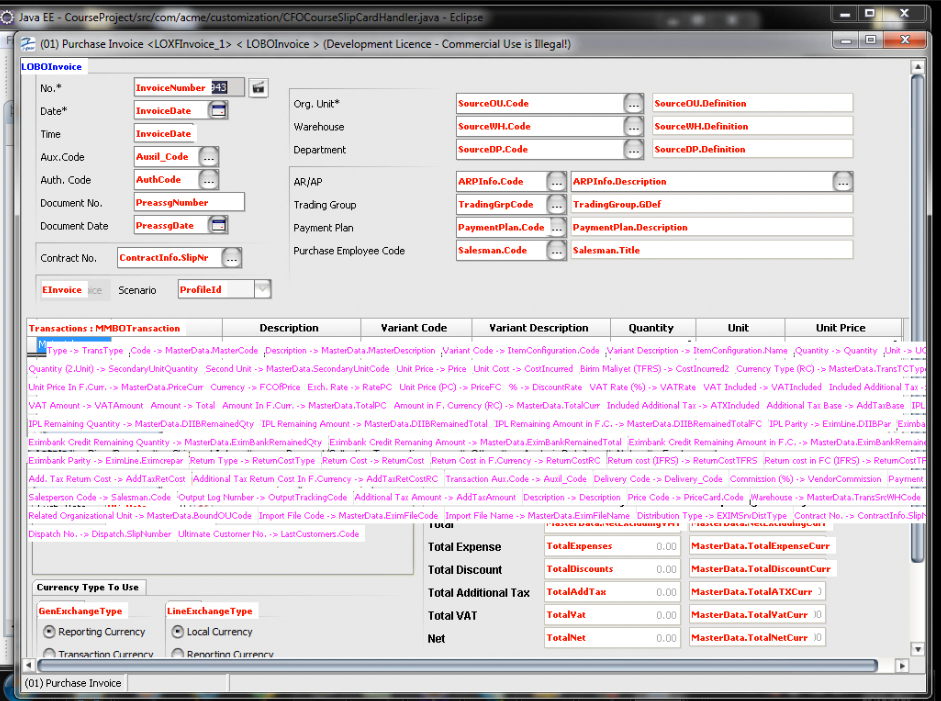
- You need to know the name of the objects that you need to modify
- Note down the names as you can see
Object Name; LOBOInvoice
If you press F8 you will see the object names assigned to each field - As you see in Fig (2) MMBOTransactions (stands for Material Management
Business Object Transactions) - These are the two objects that we need to modify
- Please also note down the form name LOXFInvoice and
the browser name i.e. LOXFInvoiceBrowser
|
|
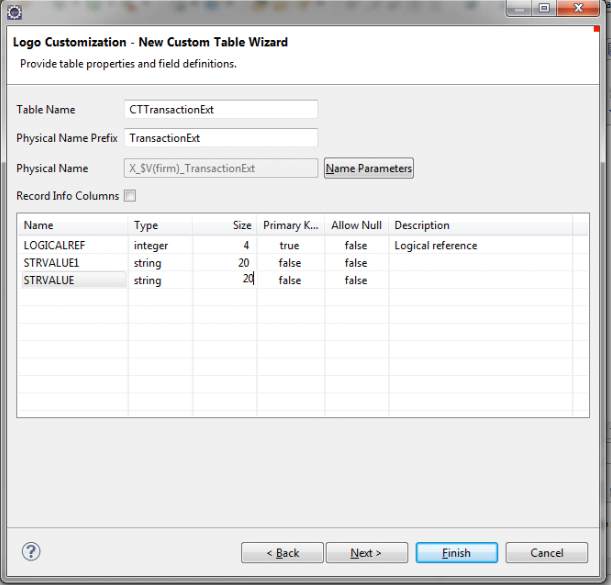
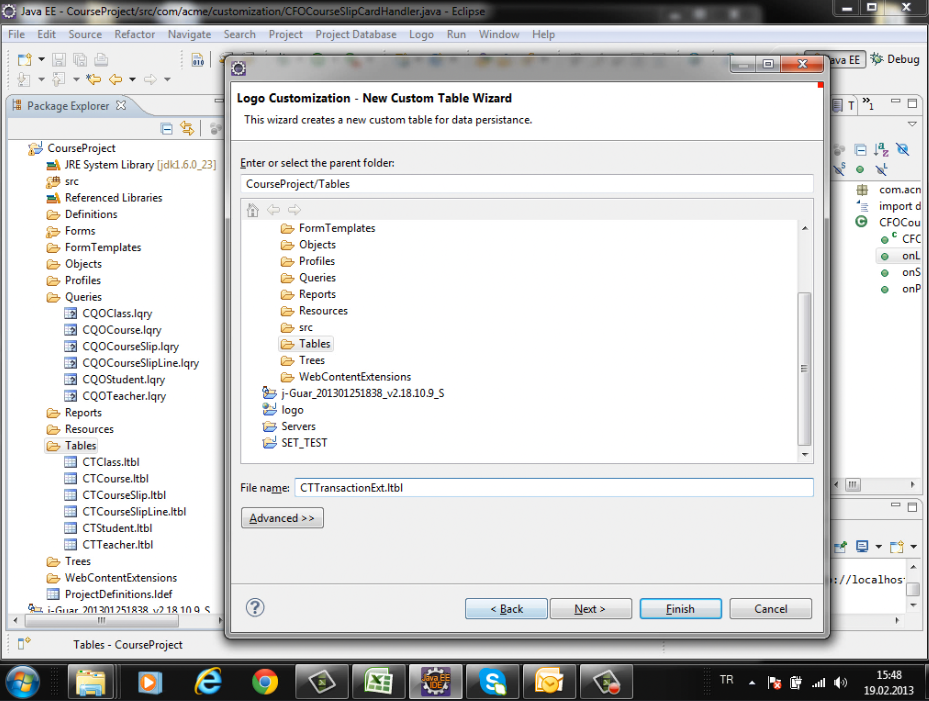
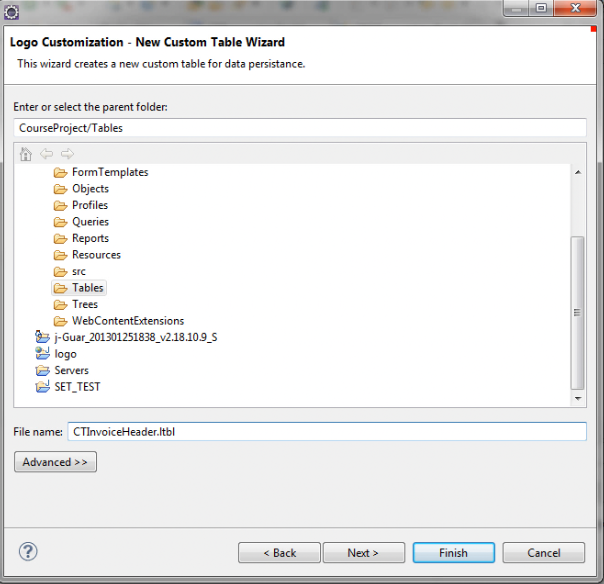
- Now we will add 2 new tables to extend them to the Purchase Invoice
form.One table for the header and one the lines. - Add new custom table CTTansactionExt
- Add the fields to the table for Invoice STRVALUE, STRVALUE1
|
|
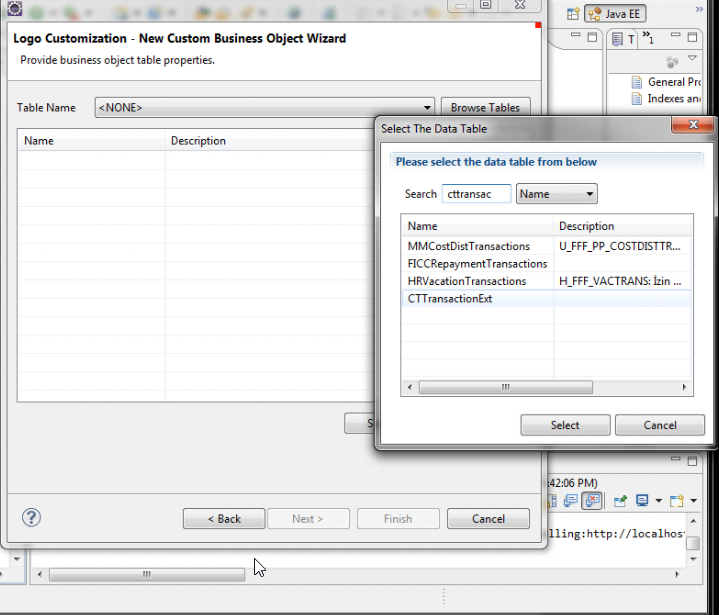
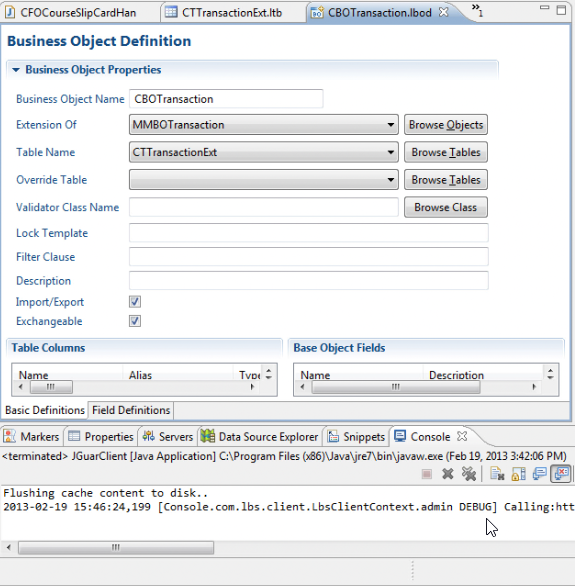
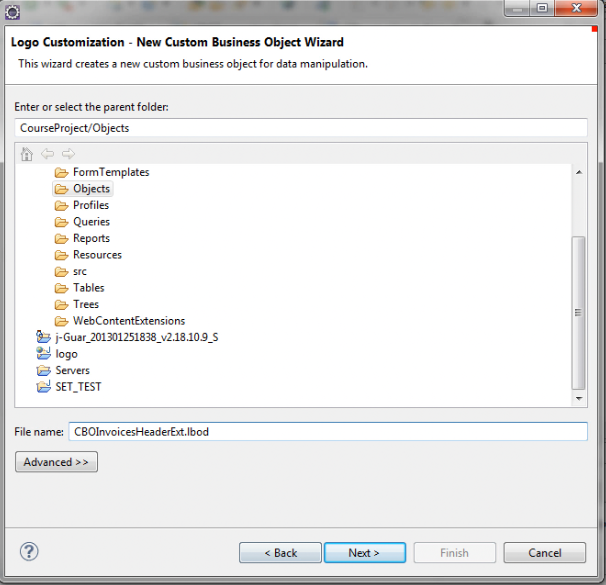
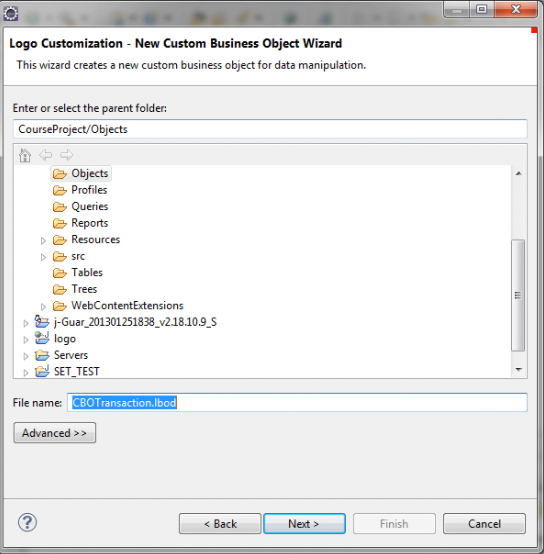
- Now we will create an object for our Custom Table
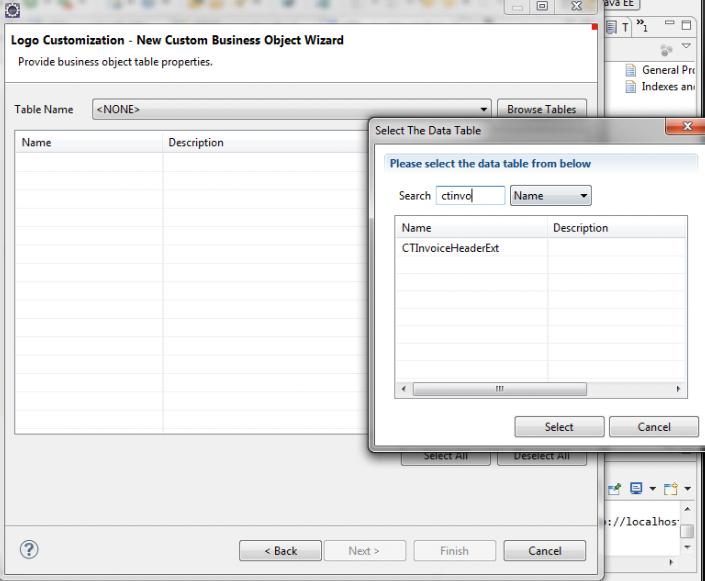
i.e. CBOTransaction - Browse and choose the table that we created
|
|
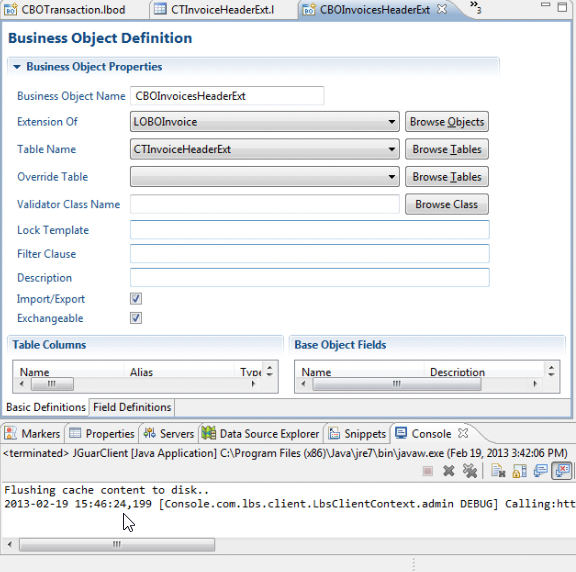
- Now since its going be an extension of another object, we need to
choose the Extension of the object. - We noted before the name of the object from the Invoice browser for which we
want to make extension i.e. MMBOTransaction
|
|
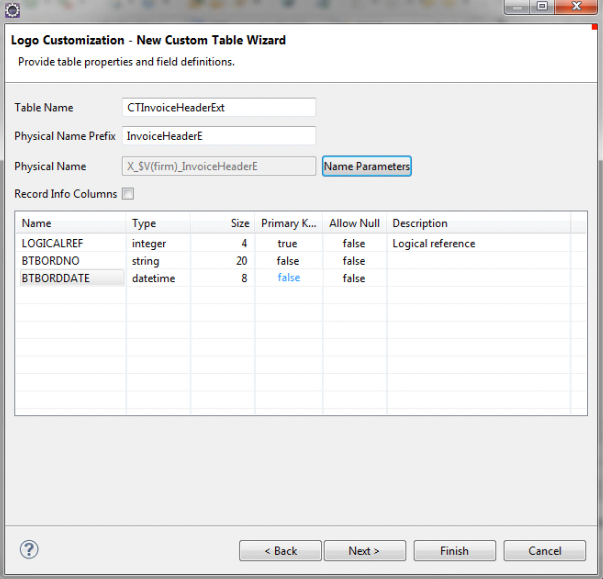
- The same way we create a new table for the InvoiceHeaderExt
- We add two fields for ORDNO and ORDDATE
|
|
- Creating an object for Header table.
- Browse and Choose the Table
|
|
- choose the Extension of the object. i.e. LOBOInvoice
|
|
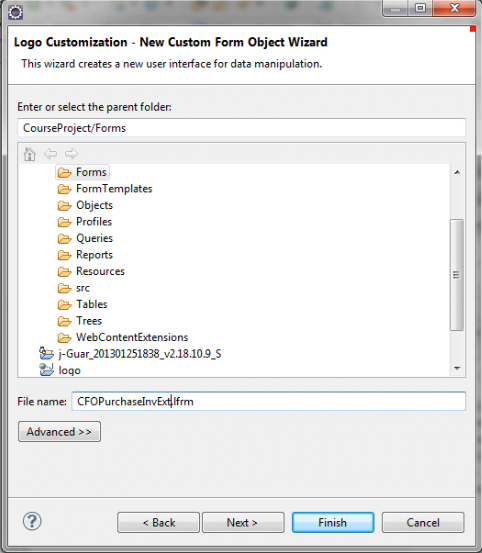
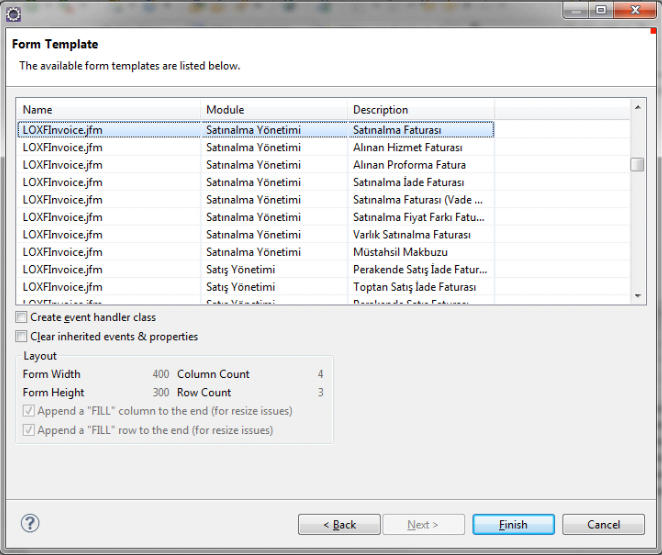
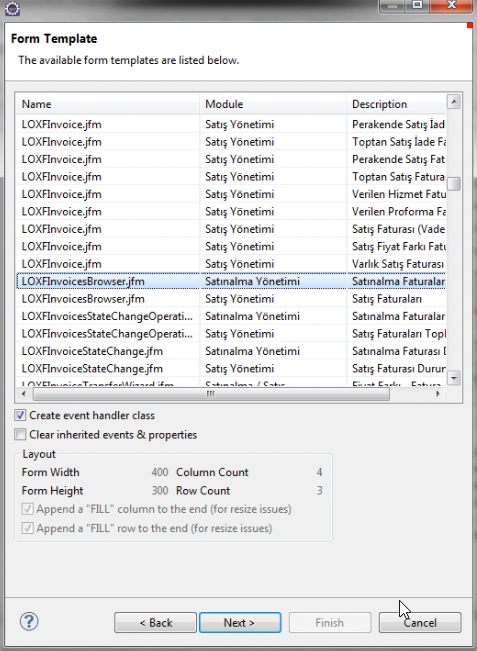
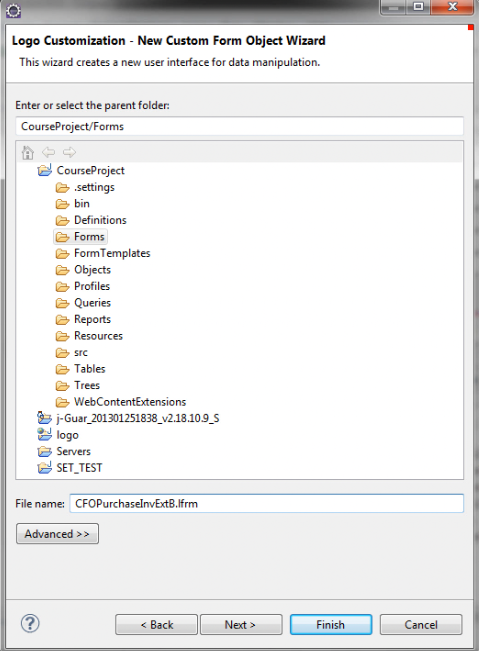
- Now make a new Custom Form Object i.e CFOPurchaseInvExt
- Please notice an important change as we use to make an empty form before
here we will choose already developed form as shown in 2nd picture.
We chose LOXFInvoice form. - Make sure you choose the one next to purchase invoice
|
|
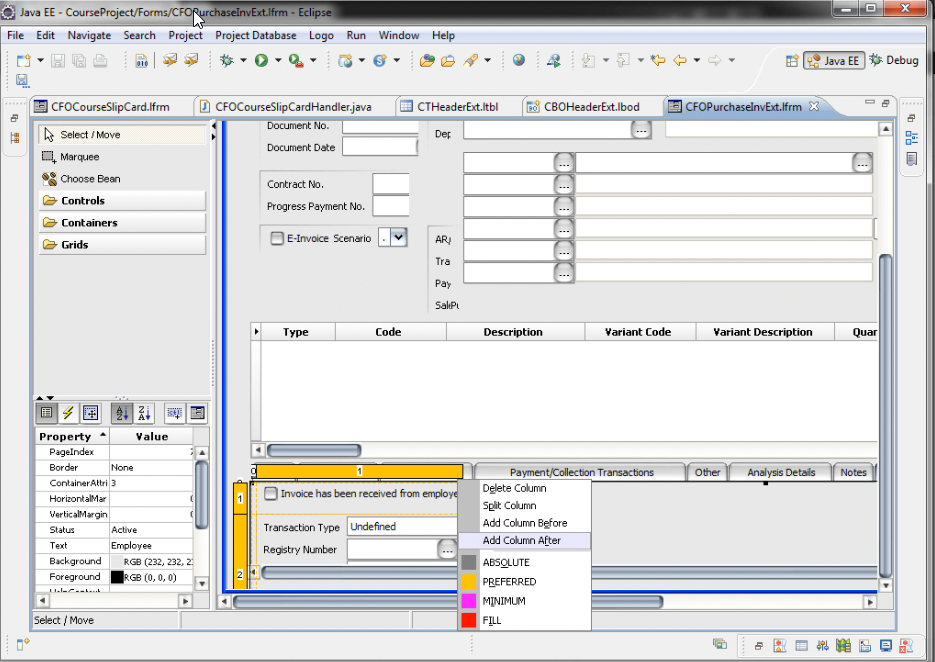
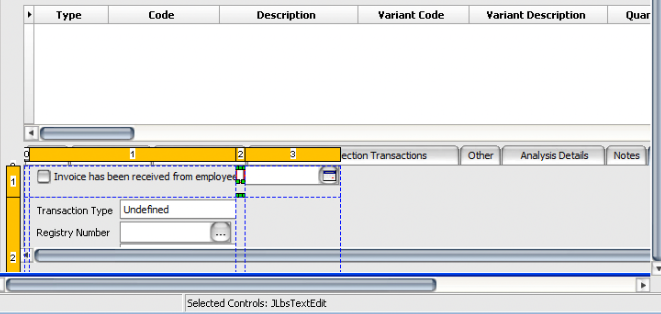
- Now open the PurchaseInvExt form from project explorer
- we have to add two new column for the extensions of the object that we created.
- We add text edit in ocolumnoum and Date edit in the other as shown in the picture
|
|
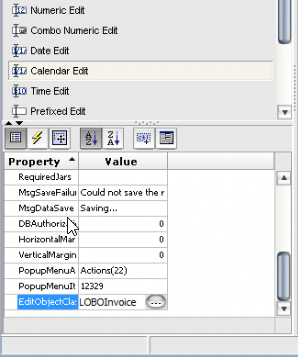
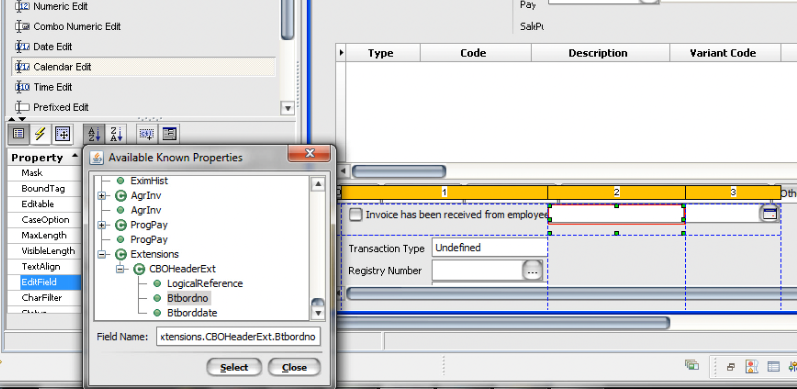
- When you create an object it automatically brings the Class object and to check you object class we can see that under property
( LOBOInvoice ). It's important to make sure your form is linked to the old original object. - Now we want to create a link between our object we created for Extension and the original object
i.e. LOBOInvoice. Go to the property to EditField and under edit field, you will find Extensions and under the extension, field will be the objects that you created BtbordNo and BtbOrdDate. - Assign BtbordNo to the text editor you created in the new column as an extension to your form and BtbOrdDate to the DateEdit as shown in the picture.
|
|
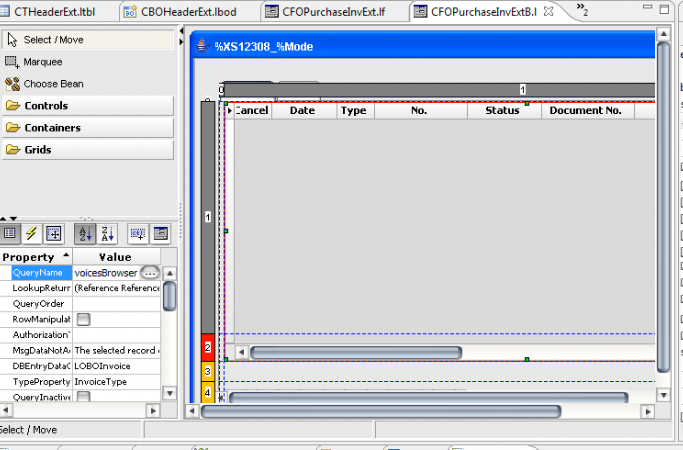
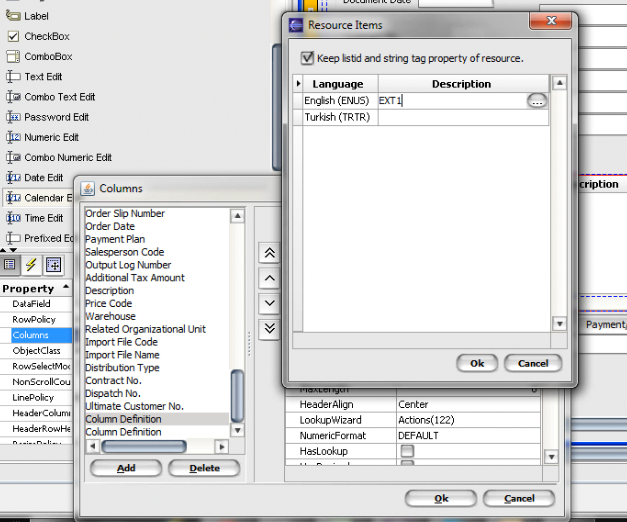
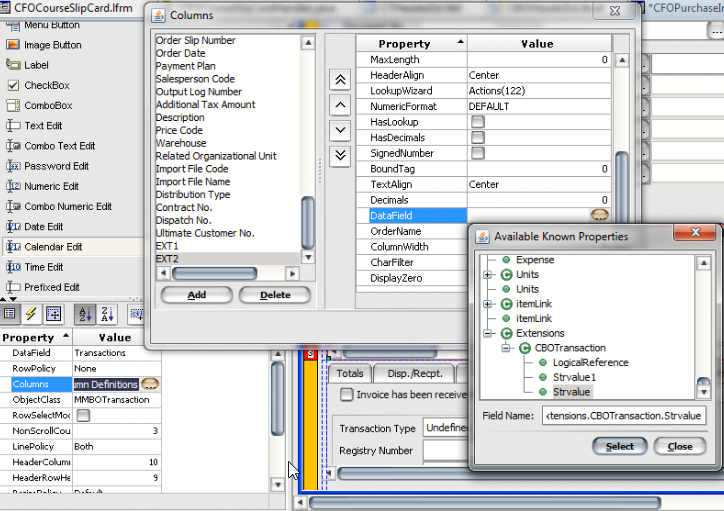
- Now we will add two new columns to our browser form
- Do add the columns go to columns definition and press add.You can edit the title of the columns
go to edit the title and for example, we will give EXT1and EXT2 - Go to DataField and choose StrValues
|
|
- Now we have to add an extension to our browser. **Note** When we extend our browser form we always create a form object.You cannot extend a form if you use browser form.
- Make a new custom form object
- Select the Browser name we want to make extension in from the list and press finish
- You will get a browser like as shown in the picture.
- Go to Query Name in the property and note down the query name we need to extend
|
|
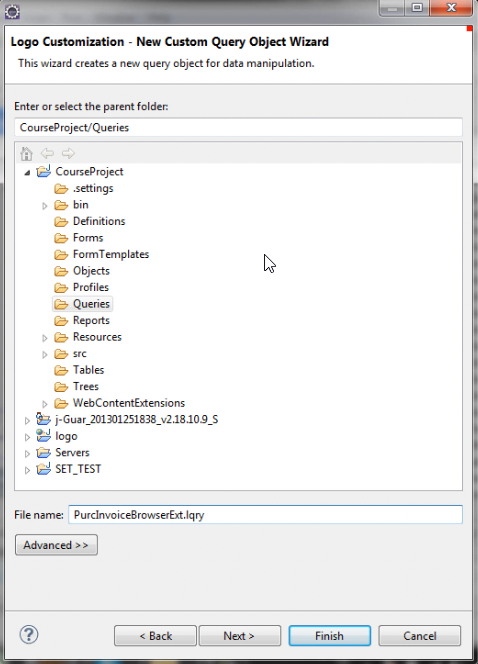
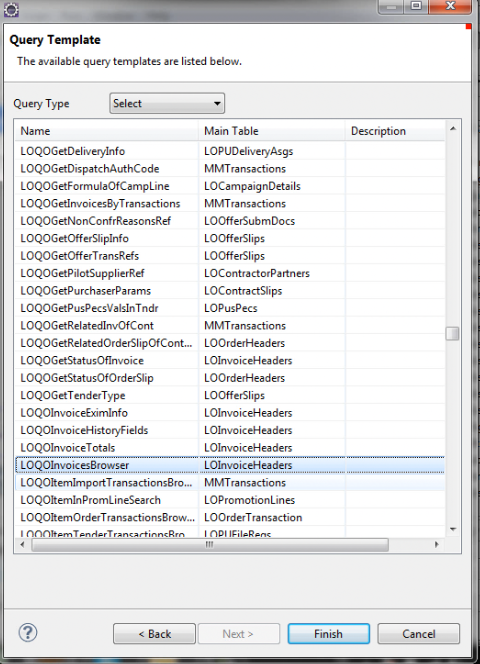
- We will create a new custom query
- Select the name of the query from the list that you noted before in the previous step i.e. LOQOInvoice
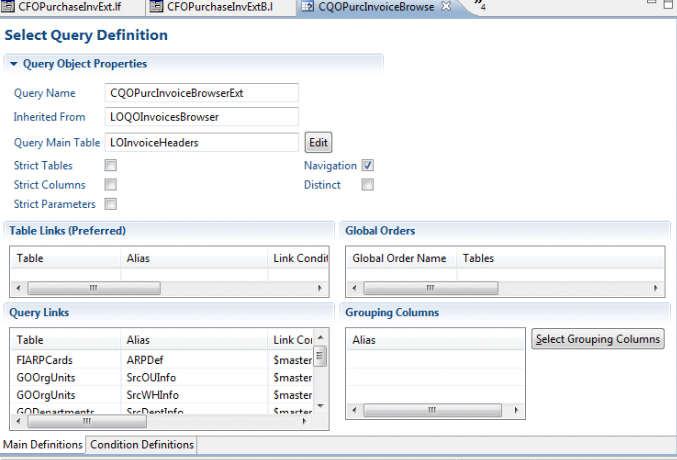
in our case. - This is how you whole definition should look like as shown in picture 3
|
|
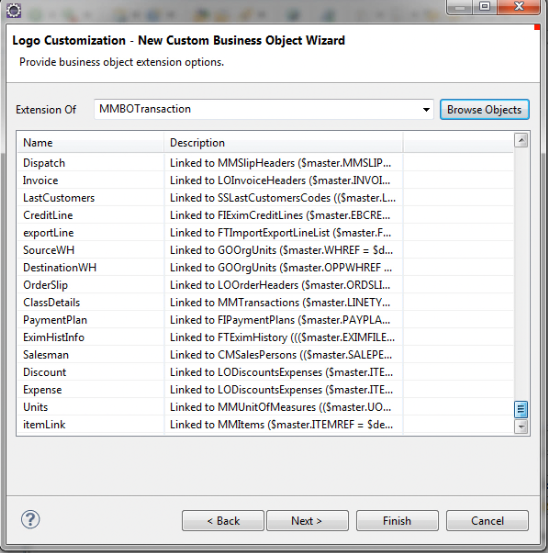
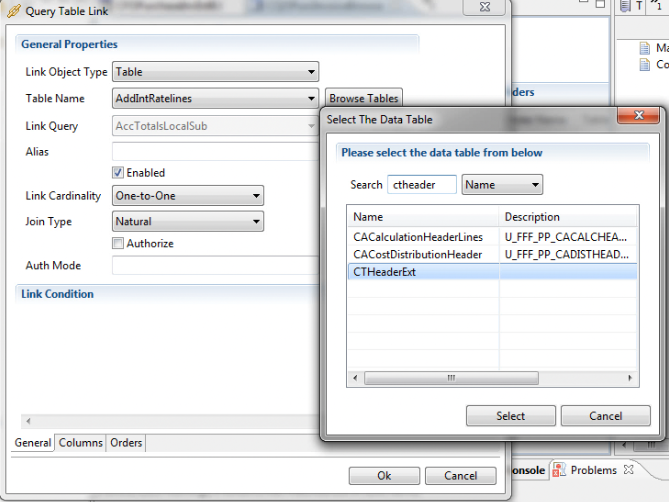
- Now we have to create a link to our query.
- We have to create a link between or HeaderExt Table and Transaction Table.
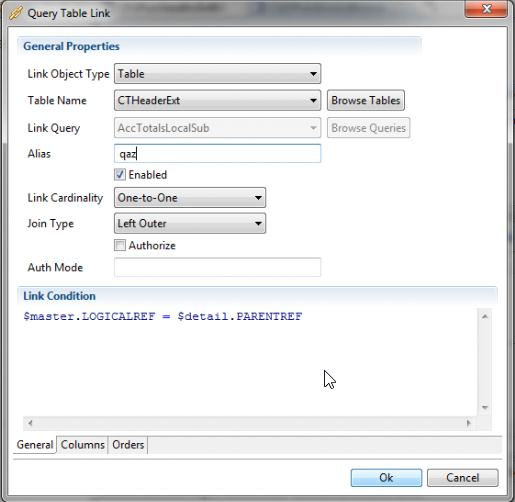
- If you see picture 3 above you will notice Query Link.
Right Click and press add --> you should get something like shown in Pıicture 1–> Browse your table - Now we have to create a relation between the queries. So under link condition, we will write
$master.LOGICALREF = $detail.PARENTREF
Your master query is the original query i.e.LOGICALREF - Give some Alias name and press OK
- Extension of the query is created
|
|
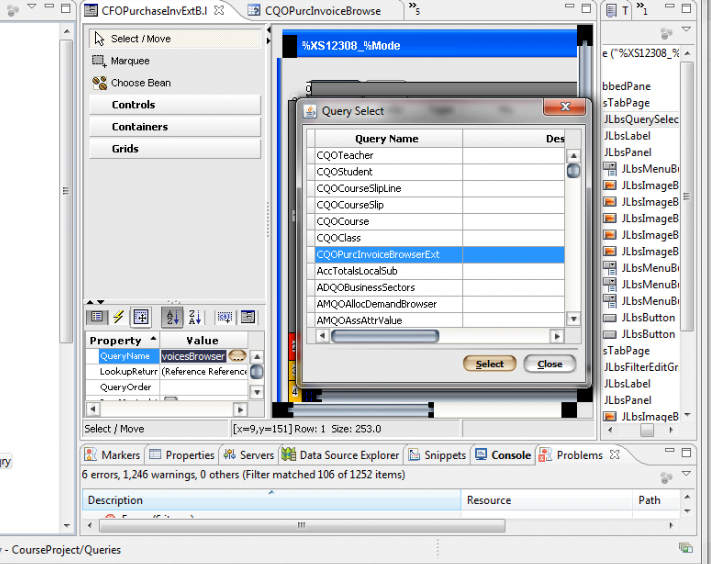
- Now we have to add the new query with the extension to our browser.
- Go to Query Name and select the new query.
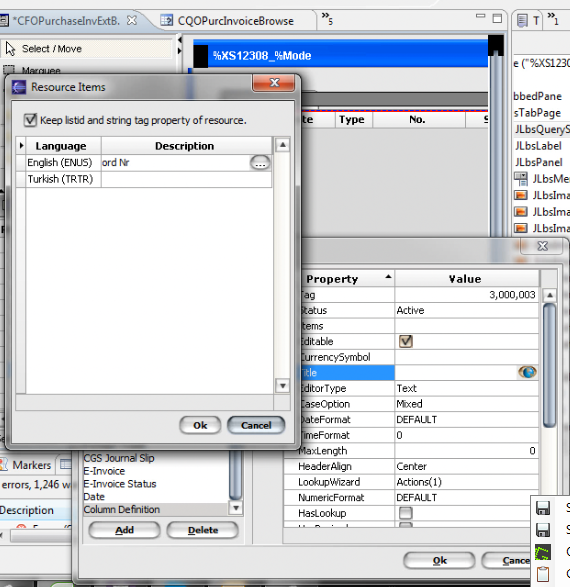
- Add two new columns to your browser form ( i.e. Date and Order Nr)
- Assign a Data Field to your columns.
|
|
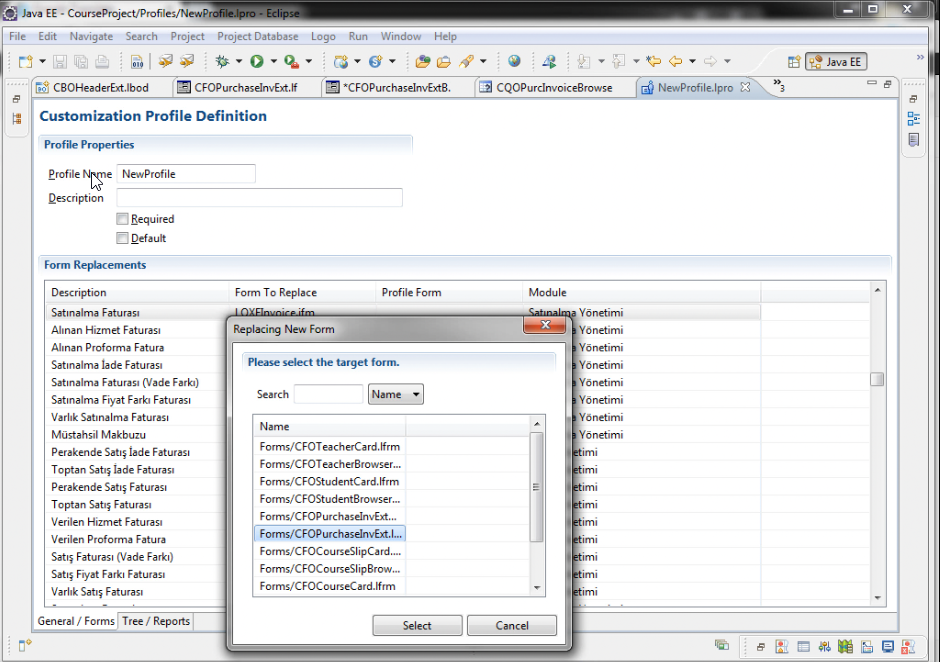
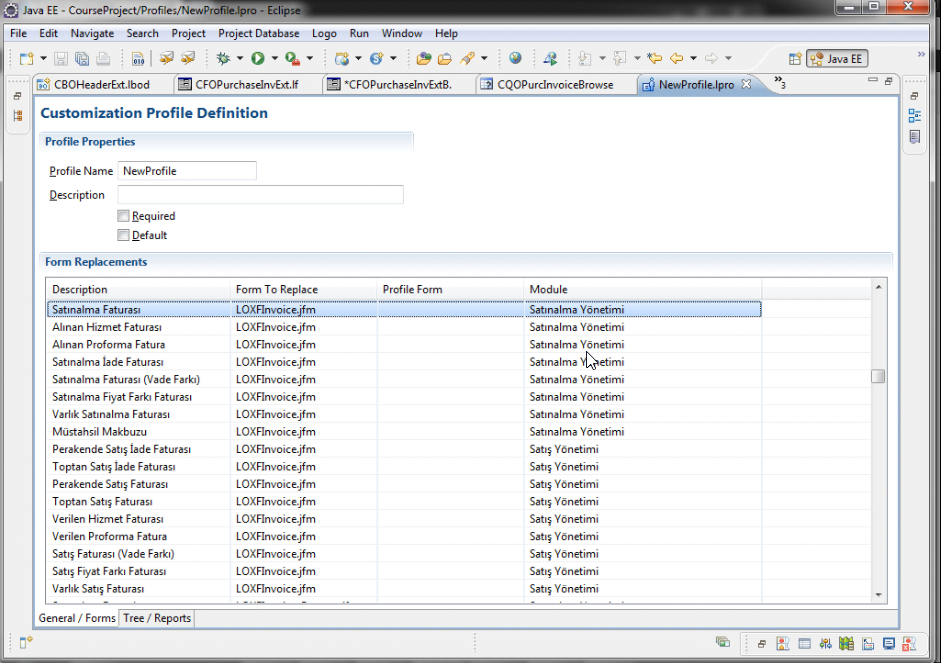
- Now we overlay or replace the form as well as the browser forms that we made with the old ones.
- So go to Custom Profile Definition
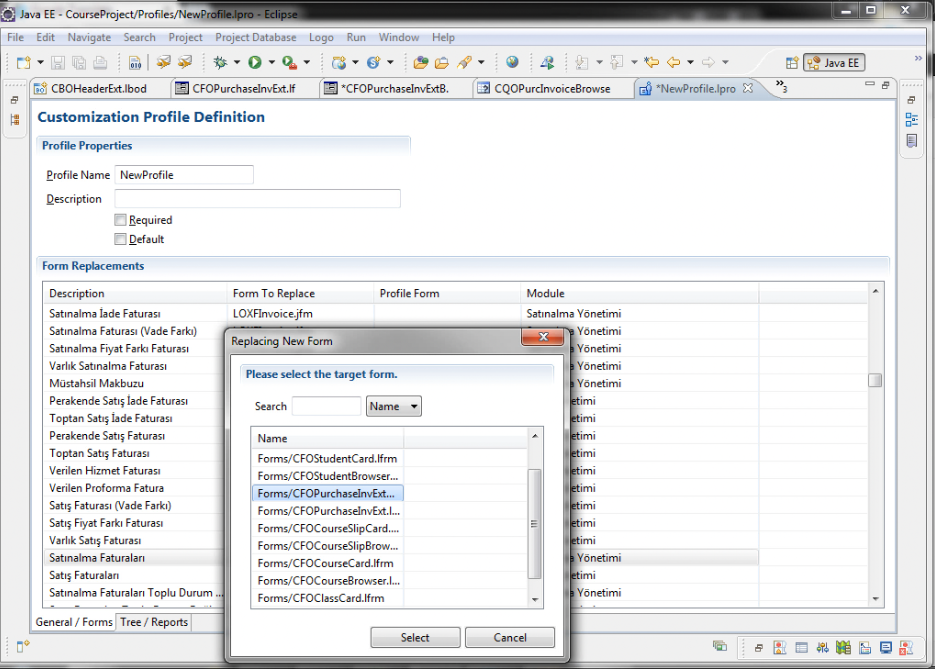
- You will see Form Replacement. You need to find your old form there and when you will double-click the form, there will be a pop up as shown in figure 2.
- Select the form you want to replace with the old one.
- Same way find the old browser form and replace with the new one as shown in picture 3
- So now your Original forms are replaced with the Customized forms
- Upgrade all your customization tables from the admin client
|
|
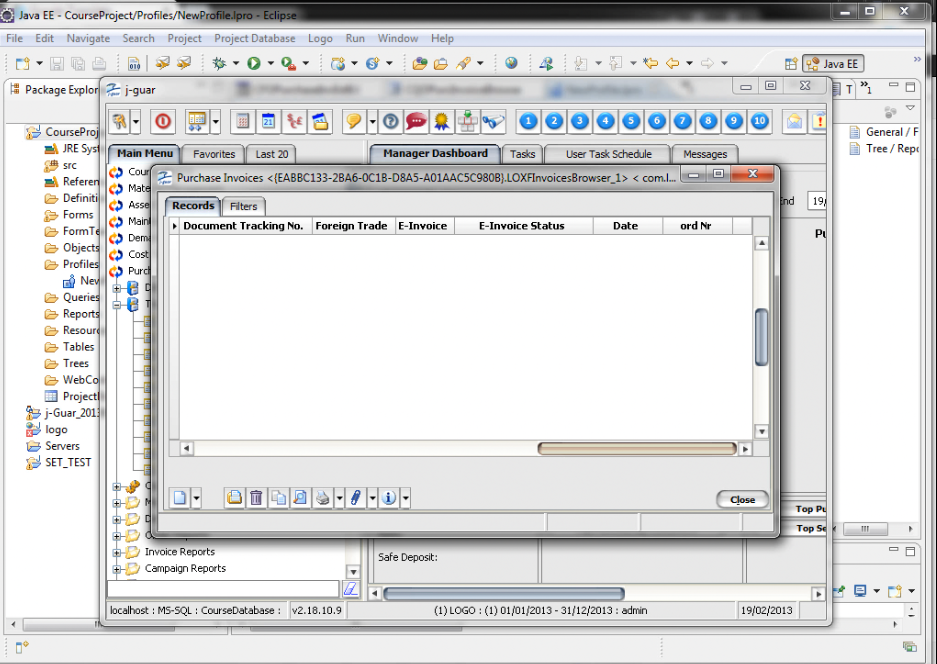
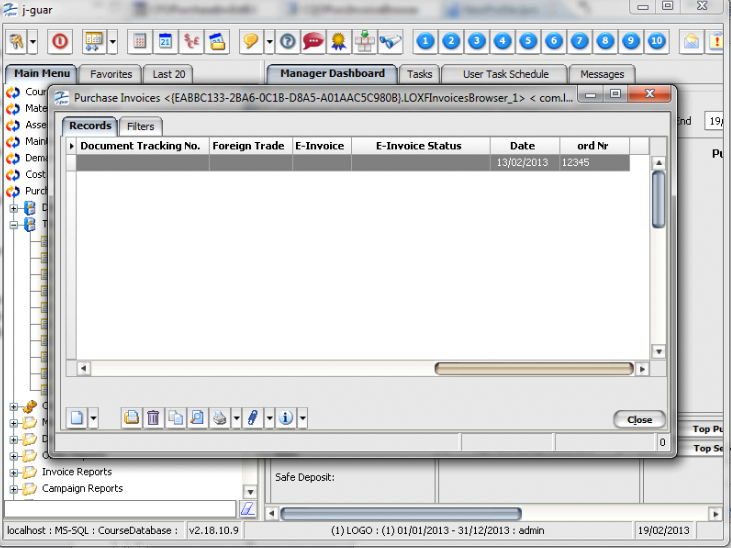
- Now open the j-platform application
- Go to Purchase Invoice Browser that we just extended.You will see your extended fields Date and Ord Nr
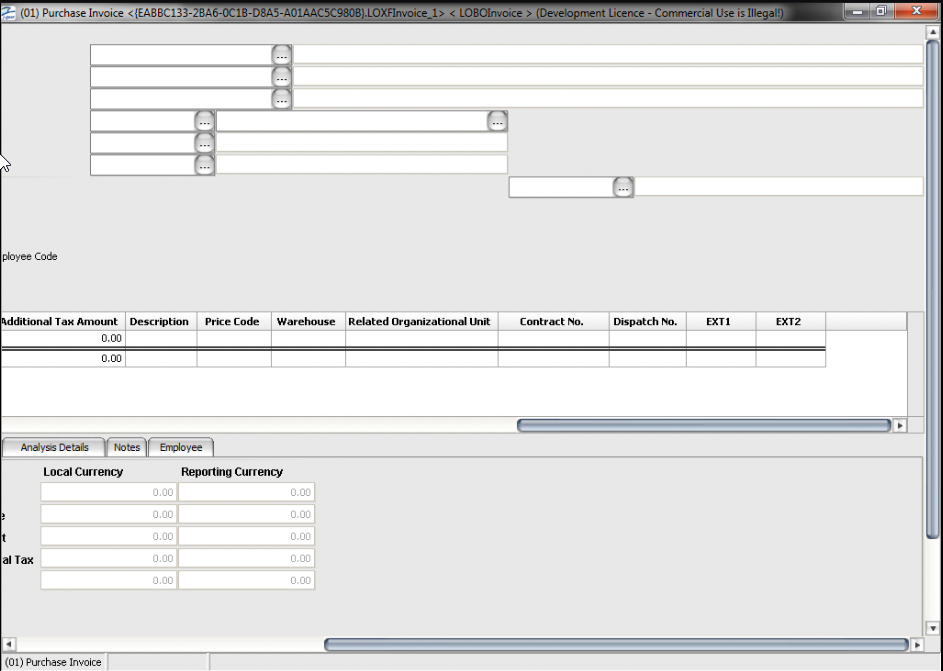
- Go to the Purchase Invoice form and you will see the extensions EXT! and EXT that you made in your
form.
|
|
- Fill in the fields in your form and press save.
- You will see your Date and Ord Nr will be saved in the extension you made in browser form.
|
|