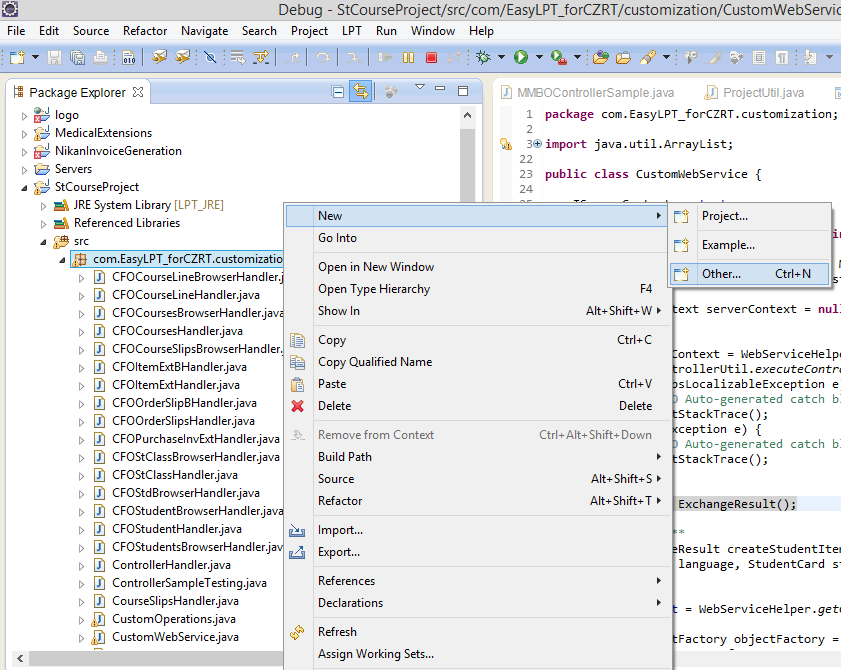
- Go to your project Src --> Right click Customization–> new–> other
|  |
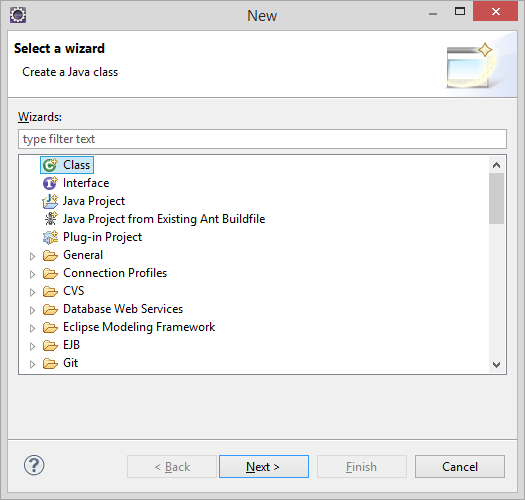
- Select class--> Next
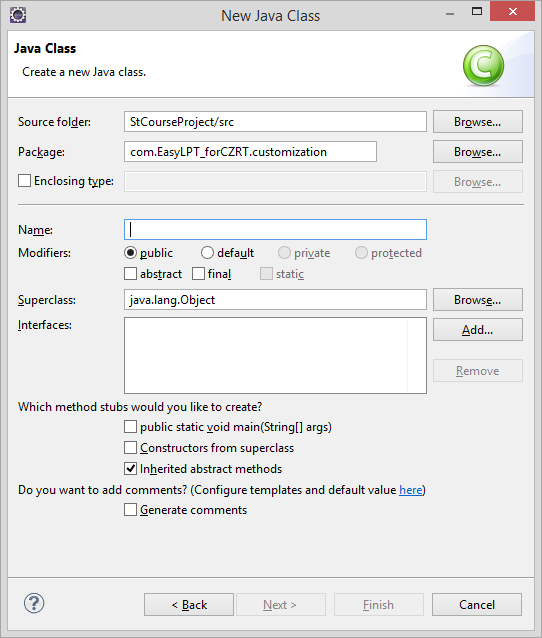
- New java class window will open
- Name the class and pres finish
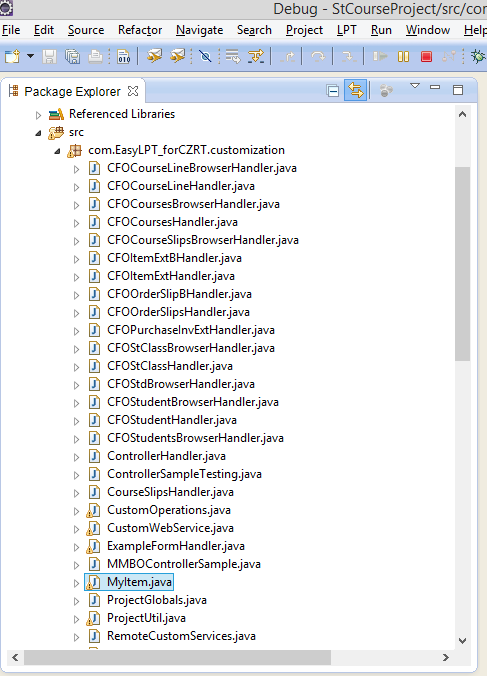
- New MyItem class will be created in the project explorer.
|    |
- In the MyItem class we will write the following code.
- Explanation of the code:
- MyItem class acts a gateway to bring data from web to our project.
- The class should implement Serializable (i.e. java.i.o.Serializable method)
- You can use Refactor–> Encapsulated field in Eclipse,It automatically creates
get and set values for your objects.
|
package com.EasyLPT_forCZRT.customization;
import java.io.Serializable;
//Implements Serializable
public class MyItem implements Serializable
{
    public String code;
	public String description;
	private String auxCode;

	// Get and Set the data from the MMBOController
	public String getCode() {
		return code;
	}
	public void setCode(String code) {
		this.code = code;
	}
	public String getdescription() {
		return description;
	}
	public void setDescription(String description) {
		this.description = description;
	}
	public String getAuxCode() {
		return auxCode;
	}
	public void setAuxCode(String auxCode) {
		this.auxCode = auxCode;
	}
}
|
- Here in MMBOController we create the object of the class MyItem and create a
constructor inside that object. - As we already passed the parameters to the object so in constructor we are just regenerating
them. - As we already set the get and set, we will get the data to the constructor.
|
package com.EasyLPT_forCZRT.customization;
import com.lbs.control.interfaces.ILbsController;
import com.lbs.controllers.ILbsControllerTask;
import com.lbs.controllers.gen.mm.MMXFItemBrowserController;
import com.lbs.controllers.gen.mm.MMXFItemController;
import com.lbs.controllers.menu.LbsMenuController;
import com.lbs.remoteclient.IClientContext;
public class MMBOControllerSample implements ILbsControllerTask
{
//Create an object of the class MyItem
	private MyItem localItem = null;
	public MMBOControllerSample(MyItem myItem)
//constructor
	{
		localItem = myItem;
	}

	public void execute(LbsMenuController menu, IClientContext context)
	{
		try
		{

			ILbsController controller = menu.launchMaterials();
			if (controller instanceof MMXFItemBrowserController)
			{
				MMXFItemBrowserController controller1 = (MMXFItemBrowserController) controller;
				controller = controller1.createNew_CGCommercialGood();
				if (controller instanceof MMXFItemController)
				{
					MMXFItemController controller2 = (MMXFItemController) controller;
					controller2.setCode("MyCODE2");
//with the help of get and set method we are importing the data here into controller.
					controller2.setDescription(localItem.getdescription());
					controller2.selectCheckBox_TrackbyLocation();
					controller2.selectCheckBox_DiscountInapplicable();
					controller2.selectCheckBox_Configurable();
//					controller2.setGroupCode("");
					controller2.setSearchText("mytext");
					controller2.setAux_Code(localItem.getAuxCode());

//					controller2.setAux_Code("");
					controller2.clickSave();
				}
			}
		}
		catch (Exception e)
		{
			//TODO handle your exceptions
		}
	}
}
|
- Creating CustomWebService class
- There are two ways to create a new web service :
1) Under your project go to Definitions --> Web Services.lws as shown in Fig 1
2) Under your project go to ProjectDefinitions.ldef as shown in Fig 2
| (1) 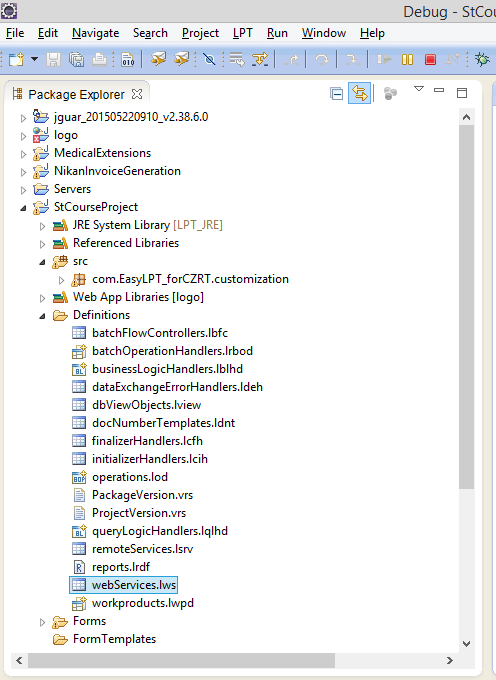 (2) (2) 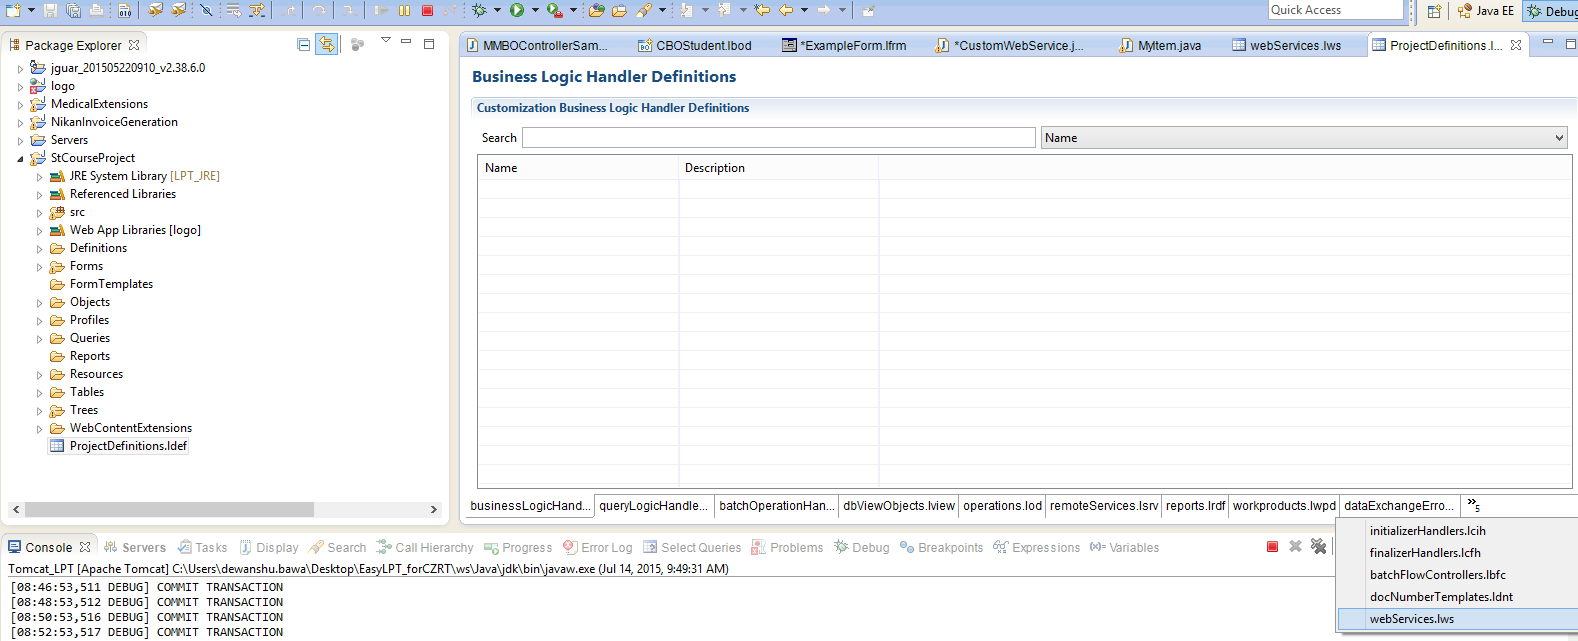 |
- Both the methods you will get this window
1) Right Click on the window, you will see an Add button
2) You will get a Web Service Definition Window
- Give name to your service and description
- Browse your WebService Main Class
- Press Ok and your web service class is created - For example we created WebServiceTest
| (1)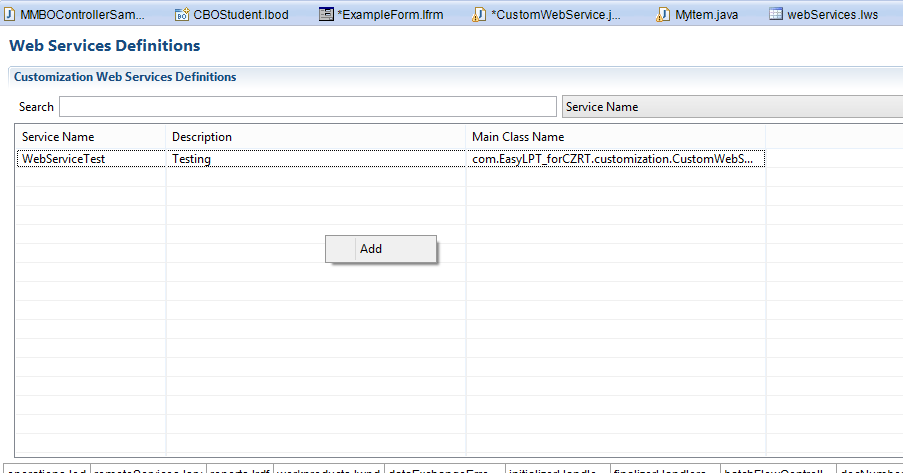 (2) (2) 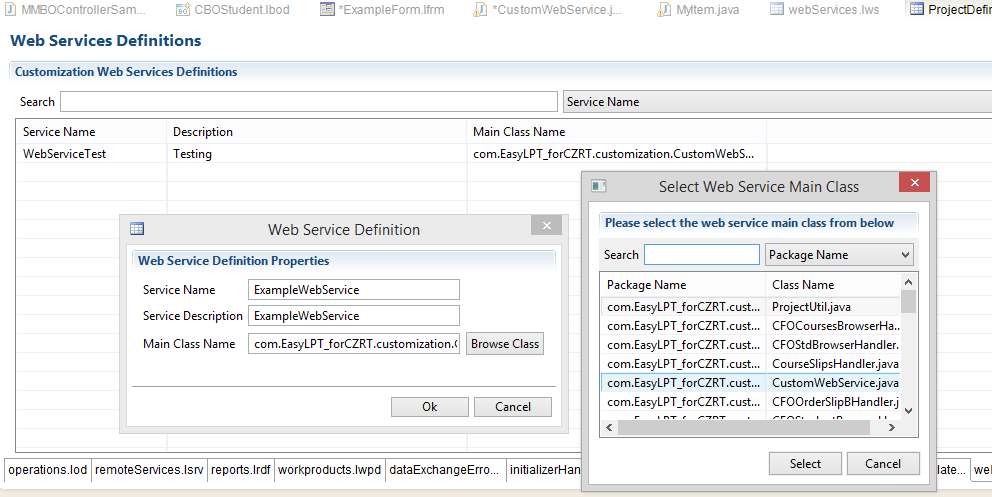 |
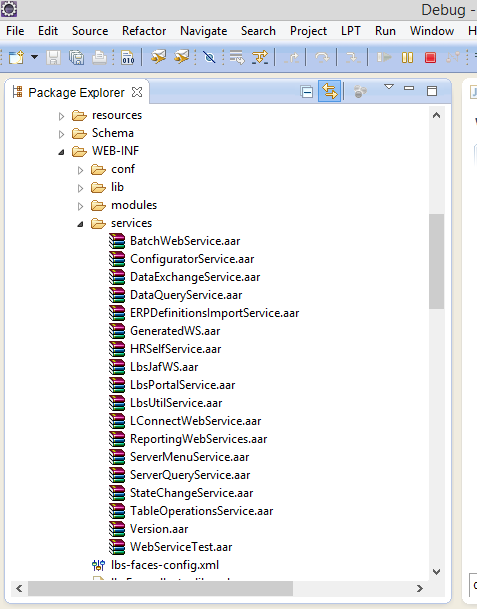
- After you deploy to check if your service is added to the Services or not follow the steps:
1) Go to logo project
2) Open WEB-INF
3) Services - You will see your service added in the list
|  |
- Under the CustomWebService we write the following code.
- We will work on Client Context and server context.
- To create a Server Context
We need 3 parameters (Firm number,period number,language) - We will call (item) in the MMBOController
- button that we created in the SampleController pass the
executeController that calls the Sample which generates the material - IServerContext : is the properties of the environment that we read
(eg. firm No,period number,language).We have to create the object on ServerContext in
the execute Controller. - We need to generate the ServerContext as we are outside the environment so to activate
we need the parameters (Firm number,period number,language) - Put it under try-catch
- ExchangeResult is a method that would let us know if the web services is imported properly
or there are some errors.It gives us a report.
|
package com.acme.customization;
import com.lbs.controllers.LbsControllerUtil;
import com.lbs.localization.LbsLocalizableException;
import com.lbs.platform.interfaces.IServerContext;
import com.lbs.ws.ExchangeResult;
import com.lbs.ws.WebServiceHelper;
public class CustomWebService
{
	public ExchangeResult createMMBOItem(int firm, int period, String Language) throws LbsLocalizableException
	{
		ControllerSample sample =  new ControllerSample();

		IServerContext serverContext = null;
		try{
			serverContext = WebServiceHelper.getContext(firm, period, Language);
		}catch (Exception e) {
			e.printStackTrace();
		}
		try{

		LbsControllerUtil.executeControllerTask(serverContext, sample);
		}catch (Exception e) {
			e.printStackTrace();
		}
		return new ExchangeResult();
	}
}
|
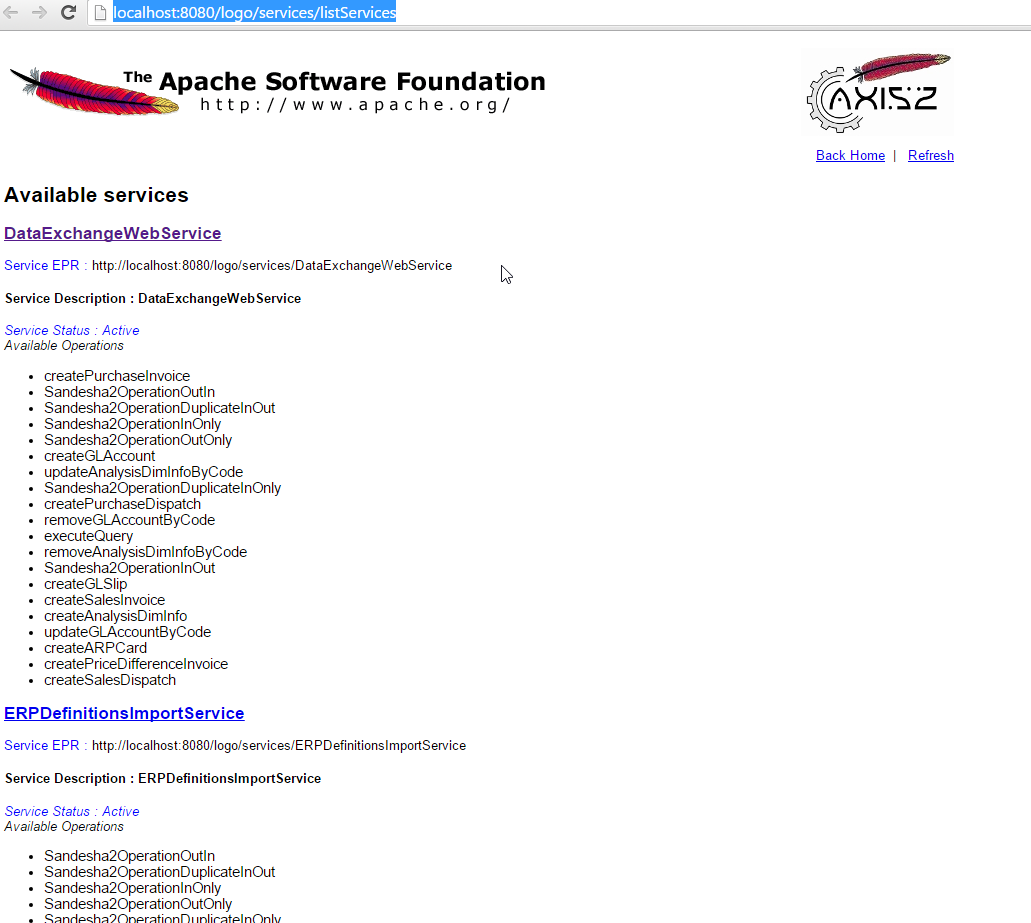
- After adding your new web service we can check if our service is added in the localhost or not.
- Go on to the link : http://localhost:8080/logo/services/listServices
- Check if your service is there.
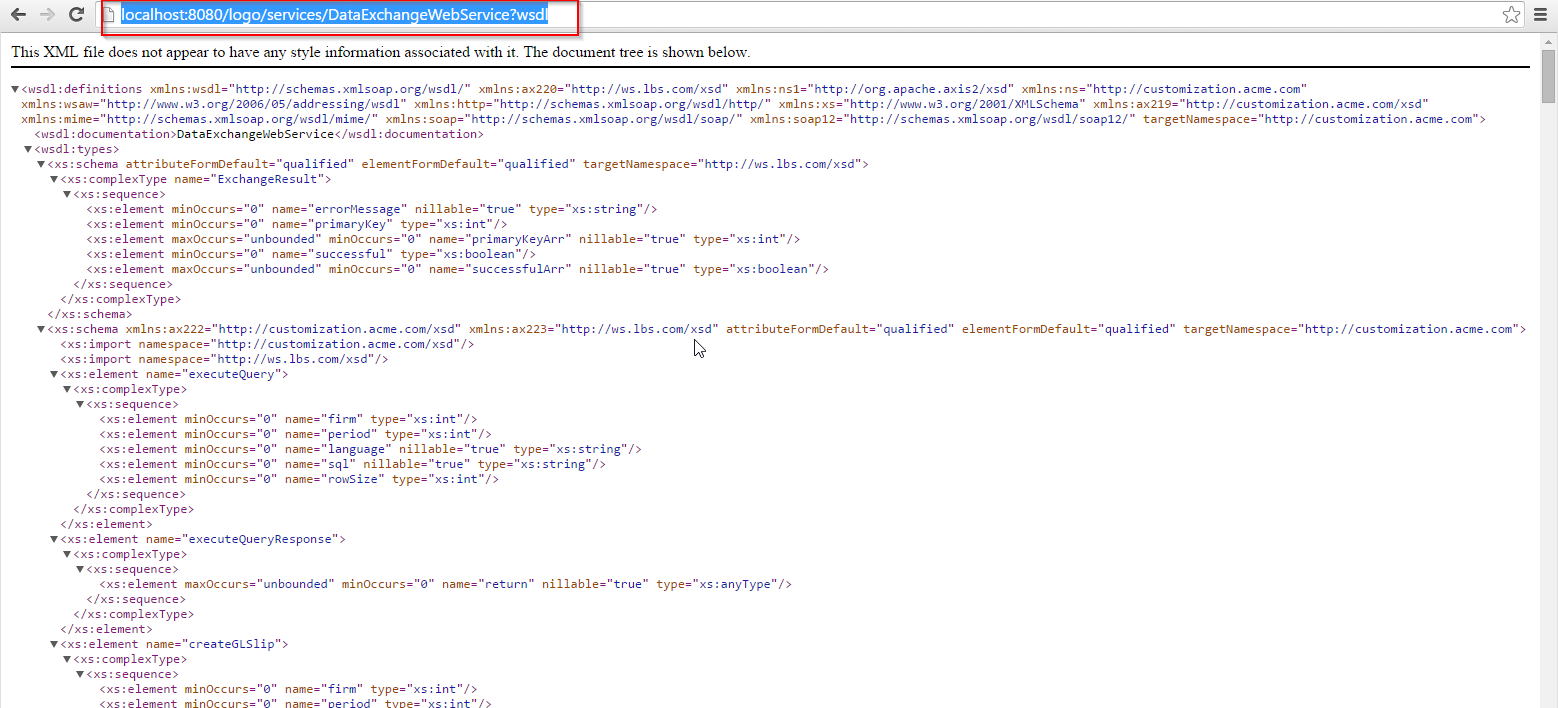
- click on the service and it will lead you to the xml coading.
- we just need to copy the wsdl code as highlighted in the second picture.
|   |
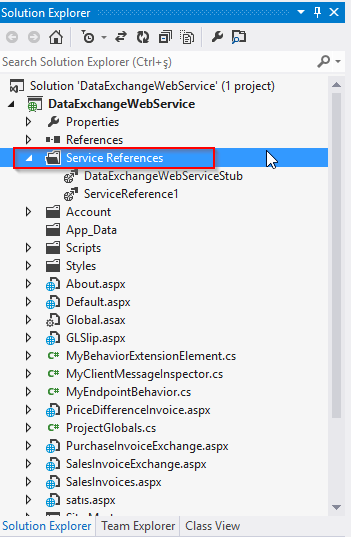
- Now our next step is to create service reference:
- Open up your web project on visual basic.
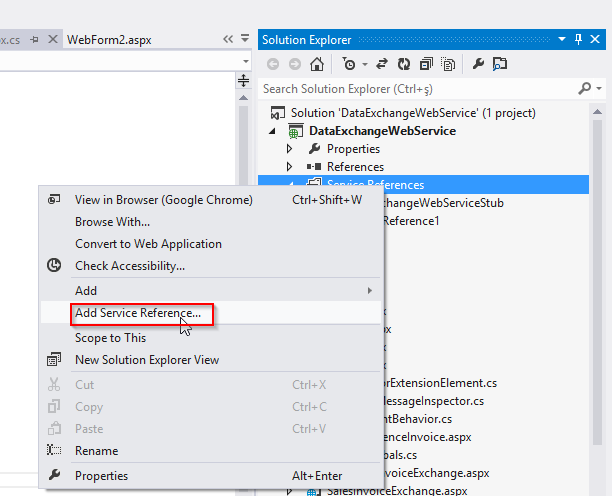
- In the Solution explorer right click on the Service References
- choose add service reference
- you will get the following window as shown in 3rd image
|   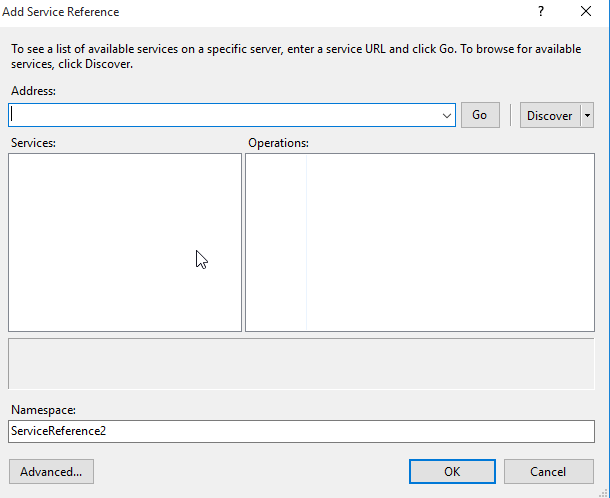 |
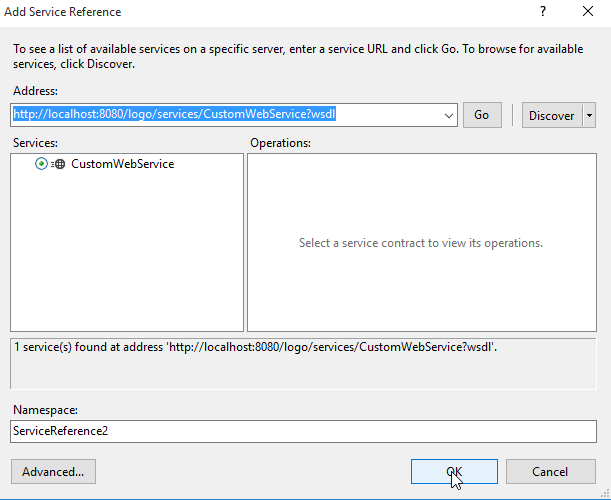
- paste the Wsdl address that you copied above and press go
- you will get your web service that you created
- select it and press ok
|  |
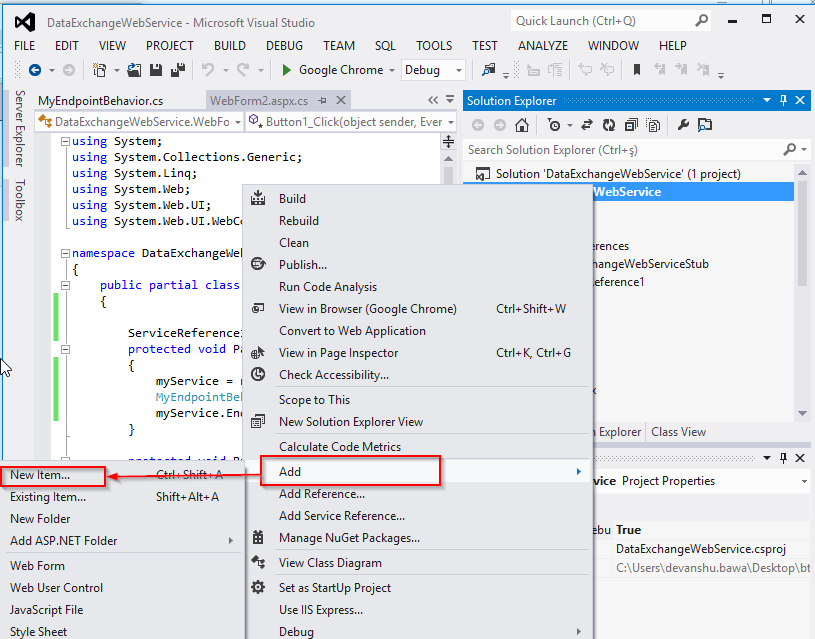
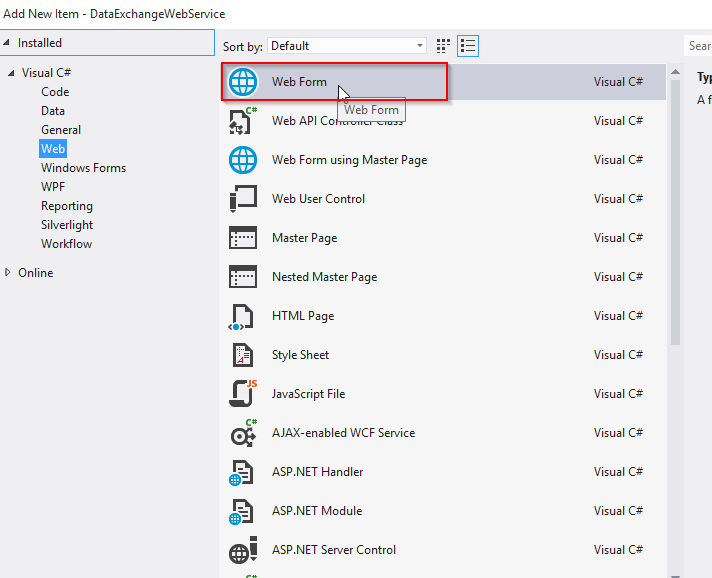
- Now add any new web form
- Right click on your web service --> go to add --> new item
- Select a web form
|   |
- In the web form following instance has to be created due to the security reasons.
- now run this web form on the browser.
|
using System;
using System.Collections.Generic;
using System.Linq;
using System.Web;
using System.Web.UI;
using System.Web.UI.WebControls;
namespace DataExchangeWebService
{
    public partial class WebForm2 : System.Web.UI.Page
    {
        ServiceReference1.CustomWebServicePortTypeClient myService = null;
        protected void Page_Load(object sender, EventArgs e)
        {
            myService = new ServiceReference1.CustomWebServicePortTypeClient("CustomWebServiceHttpSoap11Endpoint");
            MyEndpointBehavior behavior = new MyEndpointBehavior();
            myService.Endpoint.Behaviors.Add(behavior);
        }
        protected void Button1_Click(object sender, EventArgs e)
        {
            myService.createMMBOItem(1, ProjectGlobals.Period, "TRTR");
        }
    }
}
|


