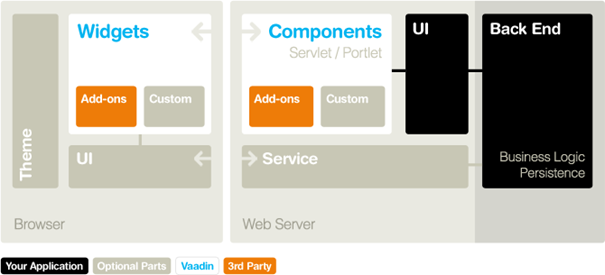
Vaadin briefly
- 100% Java based
- Built on GWT architecture, but only server side
- With GWT widgets you can extend and add-on
- Theme support
- You can develop applications with GUI development, run event-driven programming like Swing and SWT
- Can work in many servlet containers, including Google App Engine
- It can be integrated into any Java portal and has a widget structure
- You can focus more quickly on productivity, productivity, and business
Web framework.
With j-guar providing an applet-based user interface, it is an open ERP solution for any kind of integration. You can easily develop j-guar integrated HTML-based applications using j-guar infrastructure.
Here briefly
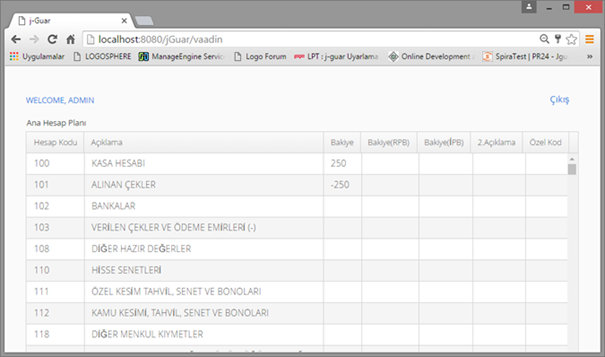
- The main account plan records in j-guar can be listed and new records can be added
- Vaadin components on the front
- The backplane uses the j-guar infrastructure libraries
Step by step a sample Vaadin project.
1. Preparing the Development Environment
First of all we need to create the Eclipse IDE and Vaadin Project related plugins;
We can download plugins for Eclipse IDE and Vaudin from the link below.
https://vaadin.com/docs/-/part/framework/installing/installing-eclipse.html#installing.eclipse
2. Create Example Project
There are two ways to create the project.
- You can import the Vaudine application we share.
- Or you can create a new project and copy the relevant java files.
We will create a new Vaudin Project in this case. You can follow the process steps below for this.
Note: The creation of the project name as jGUA makes it easier to configure.
https://vaadin.com/docs/-/part/framework/getting-started/getting-started-first-project.html
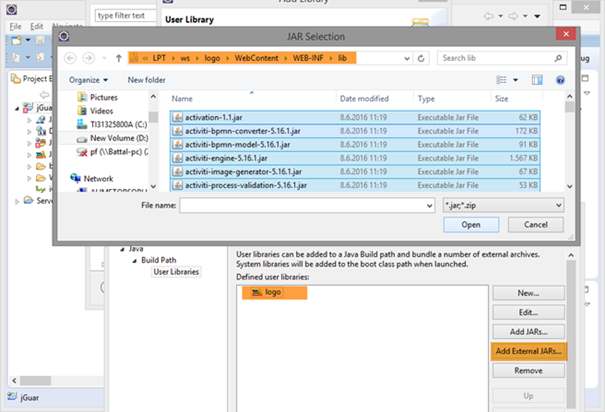
3. Add j-guar libraries
In our example, a controller structure is used to add an accounting plan. For this reason, the corresponding controller libraries need to be copied under the \ logo \ WebContent \ WEB-INF \ lib folder. From the Application Status / Copy Controller Jars, select UNGL (General Ledger) from http: // host: port / logo / Status and you can perform the copy operation with the copy button.
The j-guar libraries need to be added to the classpath of the Vaadin project. We will add all j-guar libraries as user libraries.
For this
- The Java build path screen opens on the right click properties window on the Vaadin project.
- The library of j-guar is added to the classpath as user library as follows.


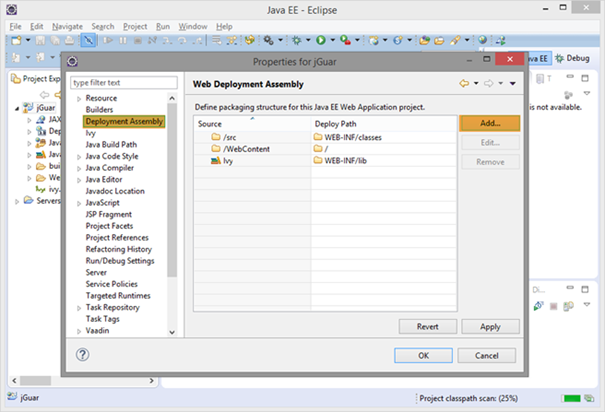
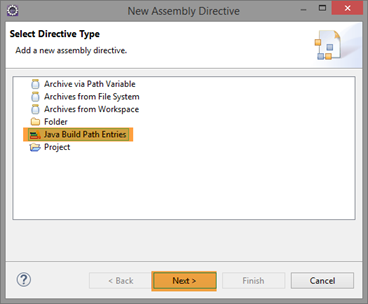
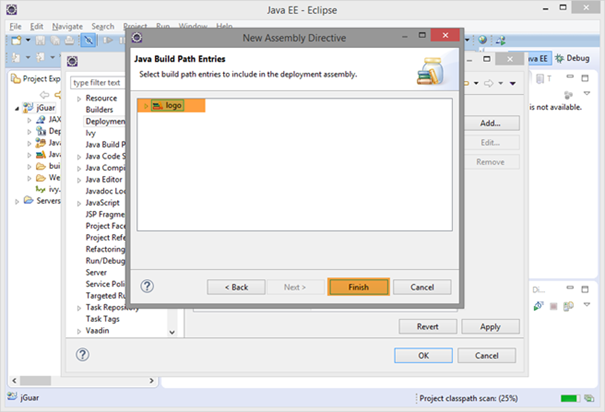
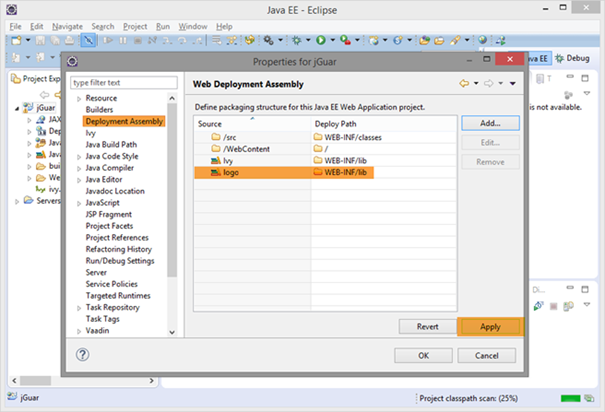
- We add the name of the build path entry that we gave the name as Deployment Assembly.
4. Copying the Java Files and Updating the Path
Finally, we copy the java files for example promise into my project.
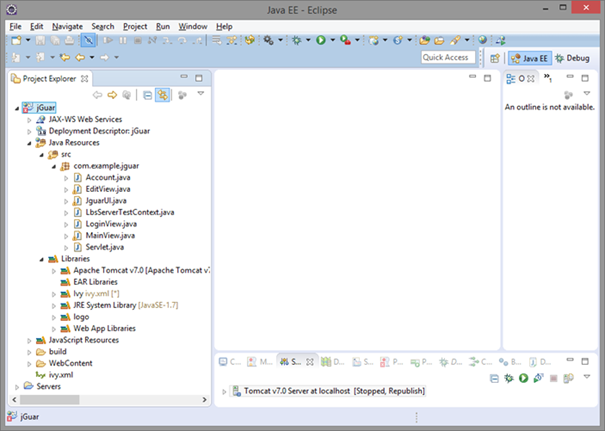
Sample Project Structure
The project structure is as follows.
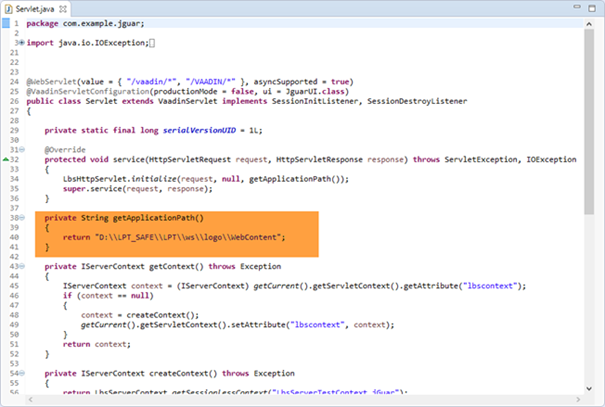
The server is initialized via the application path where j-guar is installed in the "Servlet" class of the project. This is where the database connection information is read.
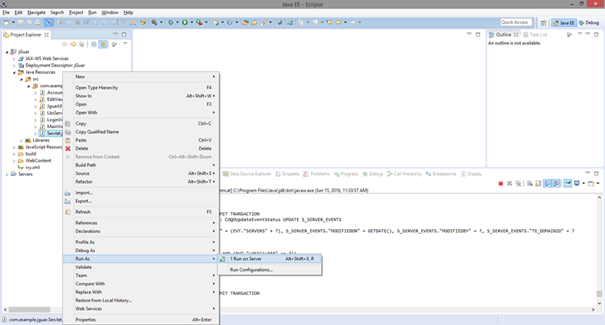
5. Run the Project
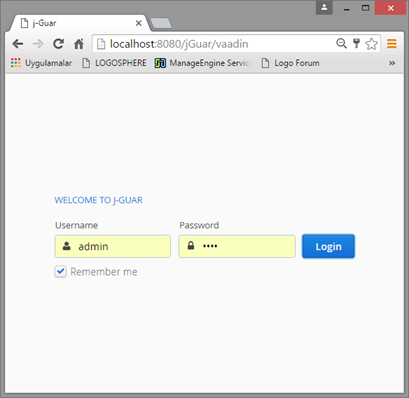
Right click on the Servlet.java class and run the project with Run As-> Run on Server, or http: // host: port / j-guar / promise via browser after starting the server.
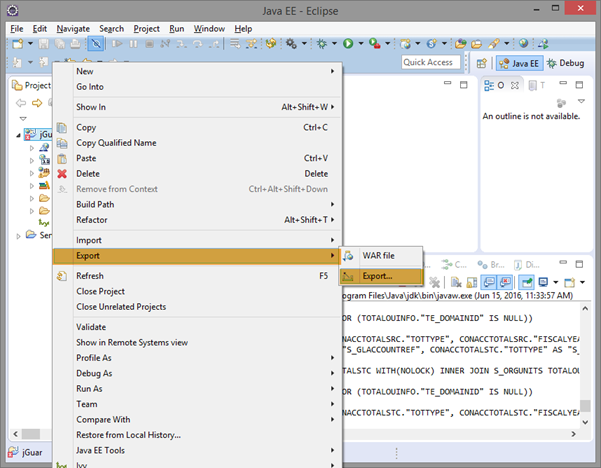
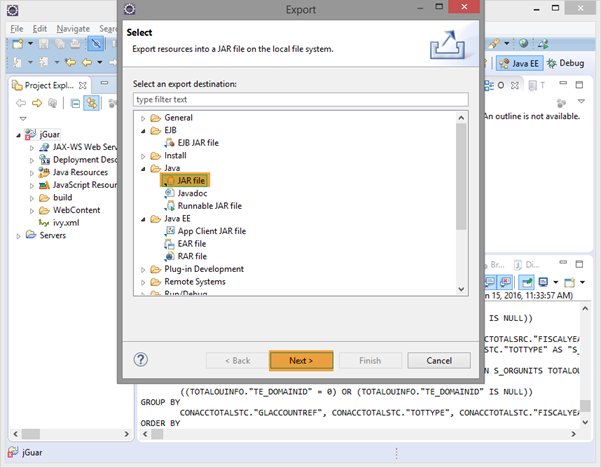
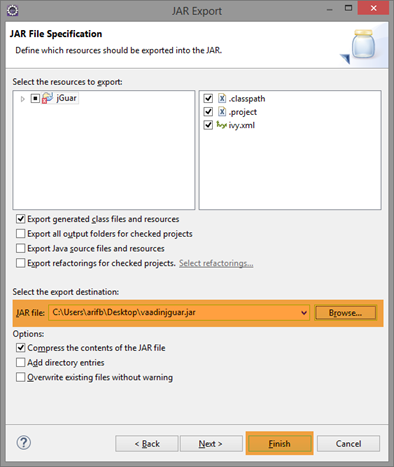
6. Deployment of Vaadin project to j-guar
The process steps that should be done by deploying the Vaadin project to j-guar and working together are as follows;
- Vaadin project should be exported as "jar" and copied to the ... / WEB-INF / lib folder in the j-guar installation.
- If the promise libraries used in the pledge project (server, shared, push, themes, client-compiled, jsoup) and extra libraries (such as promise plugin libraries) should also be copied to the j-guar ... / WEB-INF / lib folder.
- The corresponding VaadinServlet definition for the path that the Vaadin project will work on j-guar should be added to web.xml.
..\logo\WebContent\WEB-INF\web.xml
<!--Vaadin Start-->
<servlet>
       <display-name>VaadinServlet2</display-name>
        <servlet-name>VaadinServlet2</servlet-name>
        <servlet-class>com.example.jguar.Servlet</servlet-class>
        <init-param>
            <description>Vaadin UI to display</description>
            <param-name>UI</param-name>
            <param-value>com.example.jguar.JguarUI</param-value>
        </init-param>
</servlet>
<servlet-mapping>
        <servlet-name>VaadinServlet2</servlet-name>
        <url-pattern>/*</url-pattern>
</servlet-mapping>
<servlet-mapping>
        <servlet-name>VaadinServlet2</servlet-name>
        <url-pattern>/vaadin/*</url-pattern>
</servlet-mapping>
<!--Vaadin End-->
After these actions http://host:port/logo/vaadin Link and promise project through the j-guar path.
Source Code
Kaydet
Kaydet